Improving Cockpit Air Flow in the Bulk

I’ve been attempting to improve the air flow in the Bulk Mk1. I’ve learned a few things that confirm that there are some design limitations in the Bulk Mk1 to overcome.

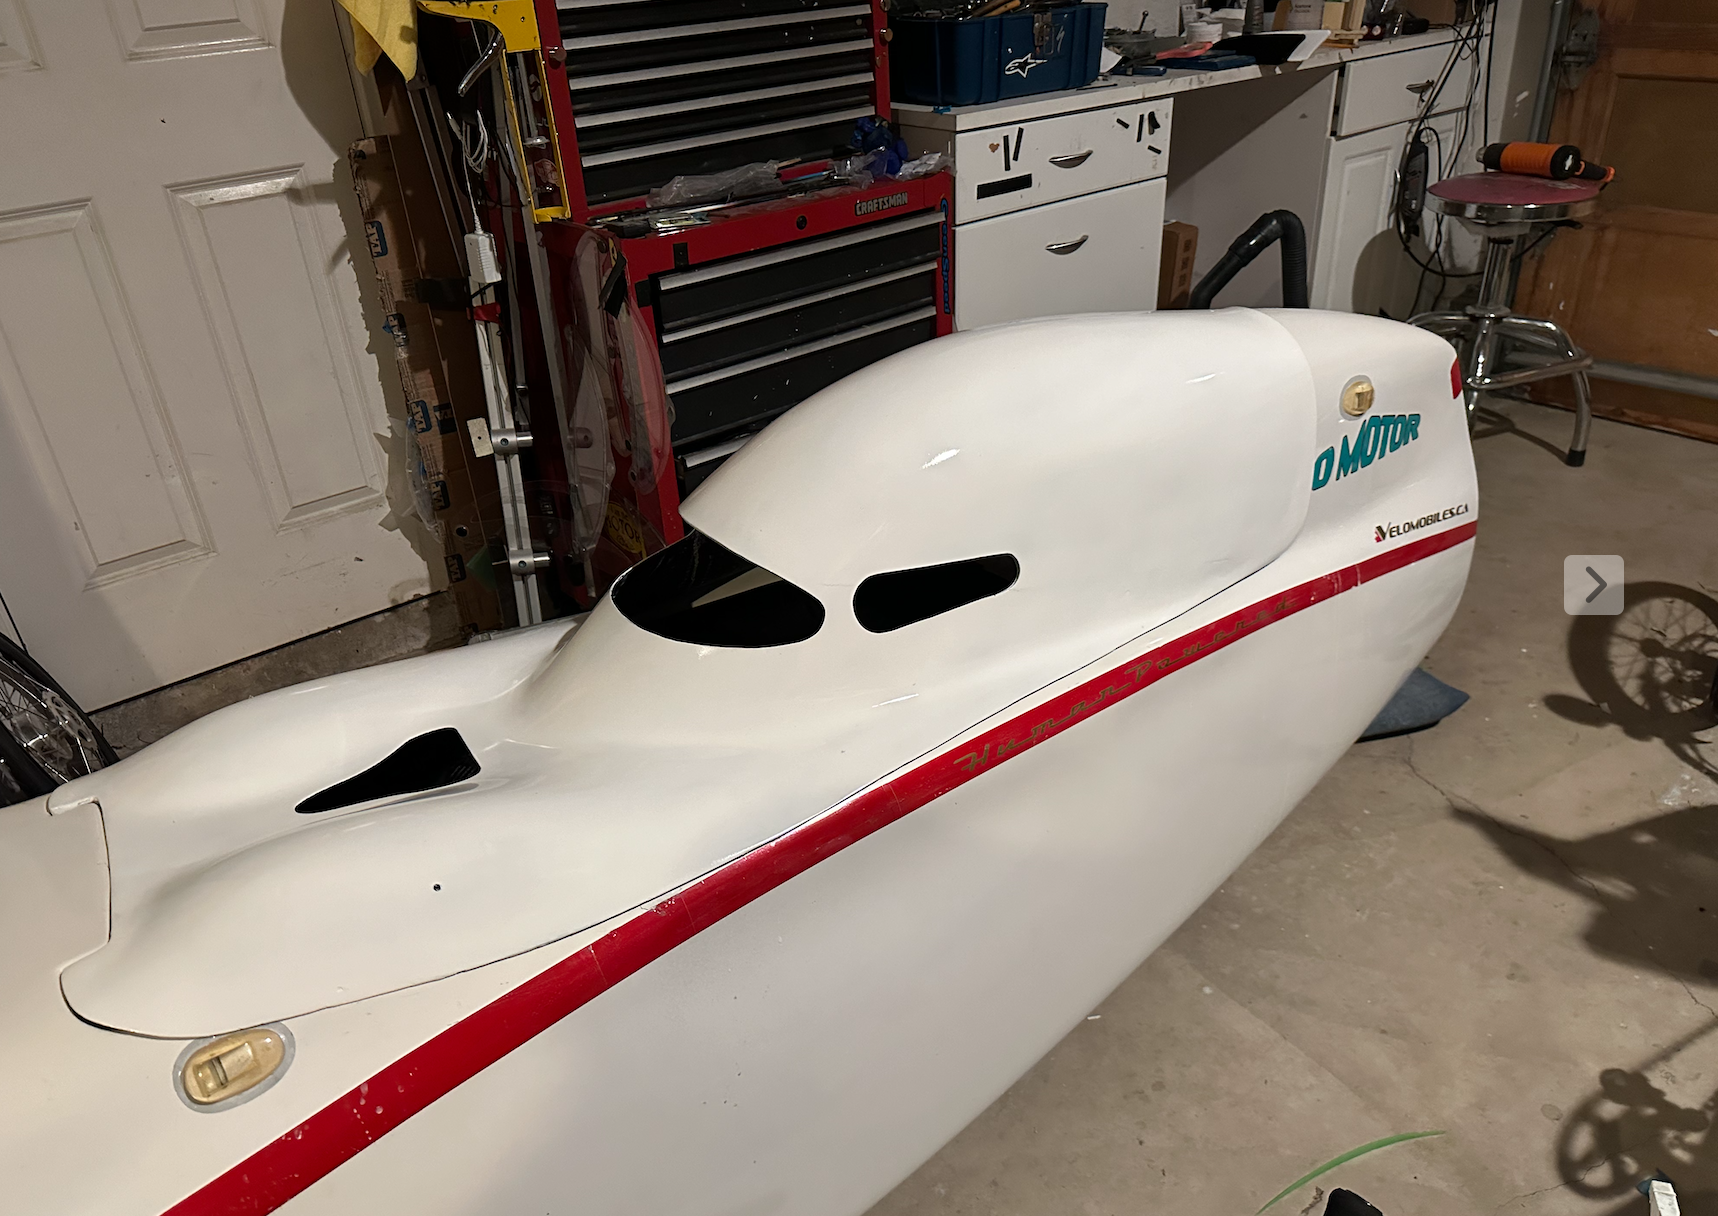
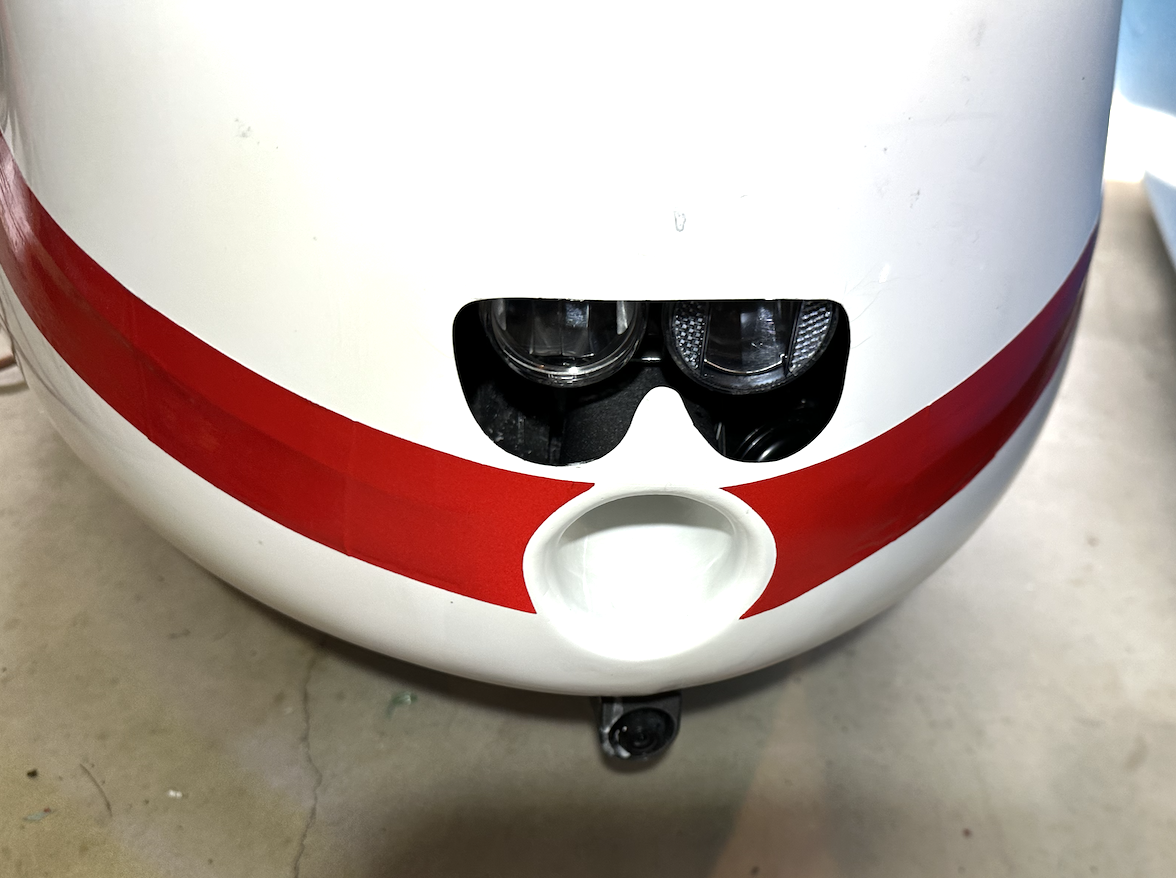
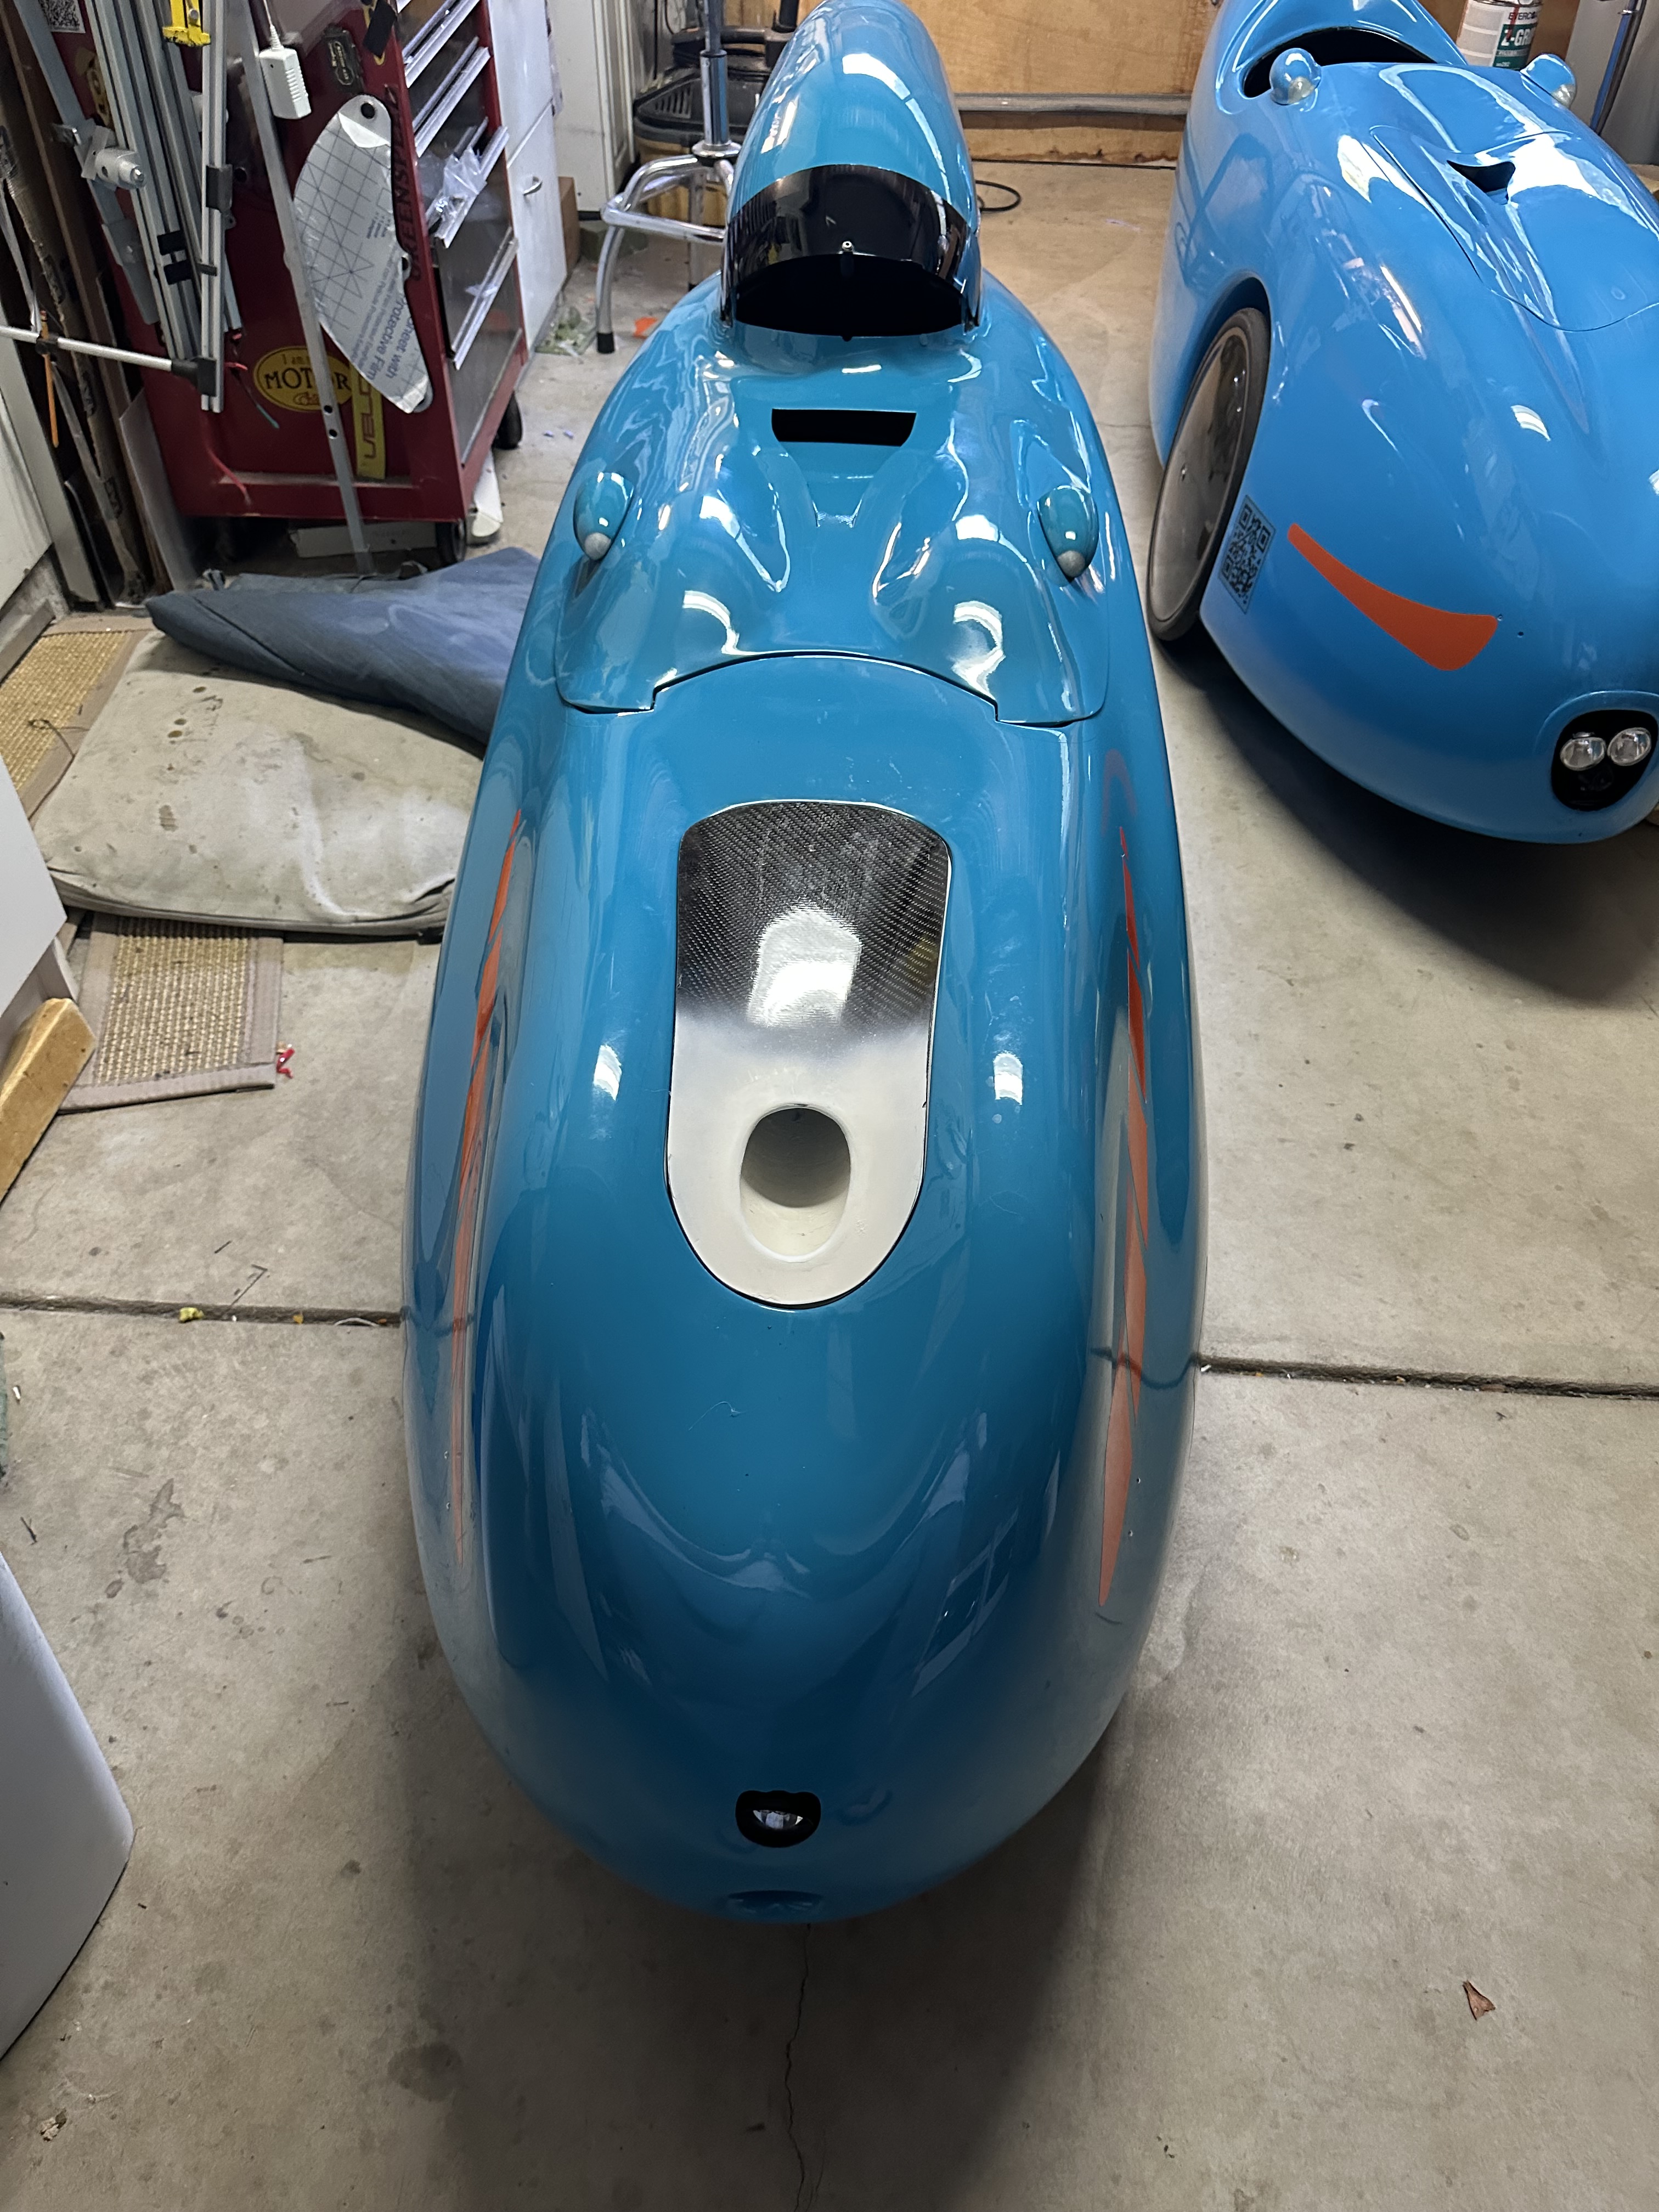
In the stock configuration, only the holes in the tail of the Bulk provide an air outlet. However, the pathway to those holes is very restricted. On the right side, there is a solid carbon fiber panel below the tray which blocks off the air flow on that side. On the left side, the gap between the wheel housing and the concave body is very small which restricts the air flow on that side. With these restrictions, the cockpit can easily become pressurized which limits the volume and velocity of incoming air flow. I’ve made a series of changes. Here is some crude tests that I performed to see what worked and what didn’t.

Current Modifications

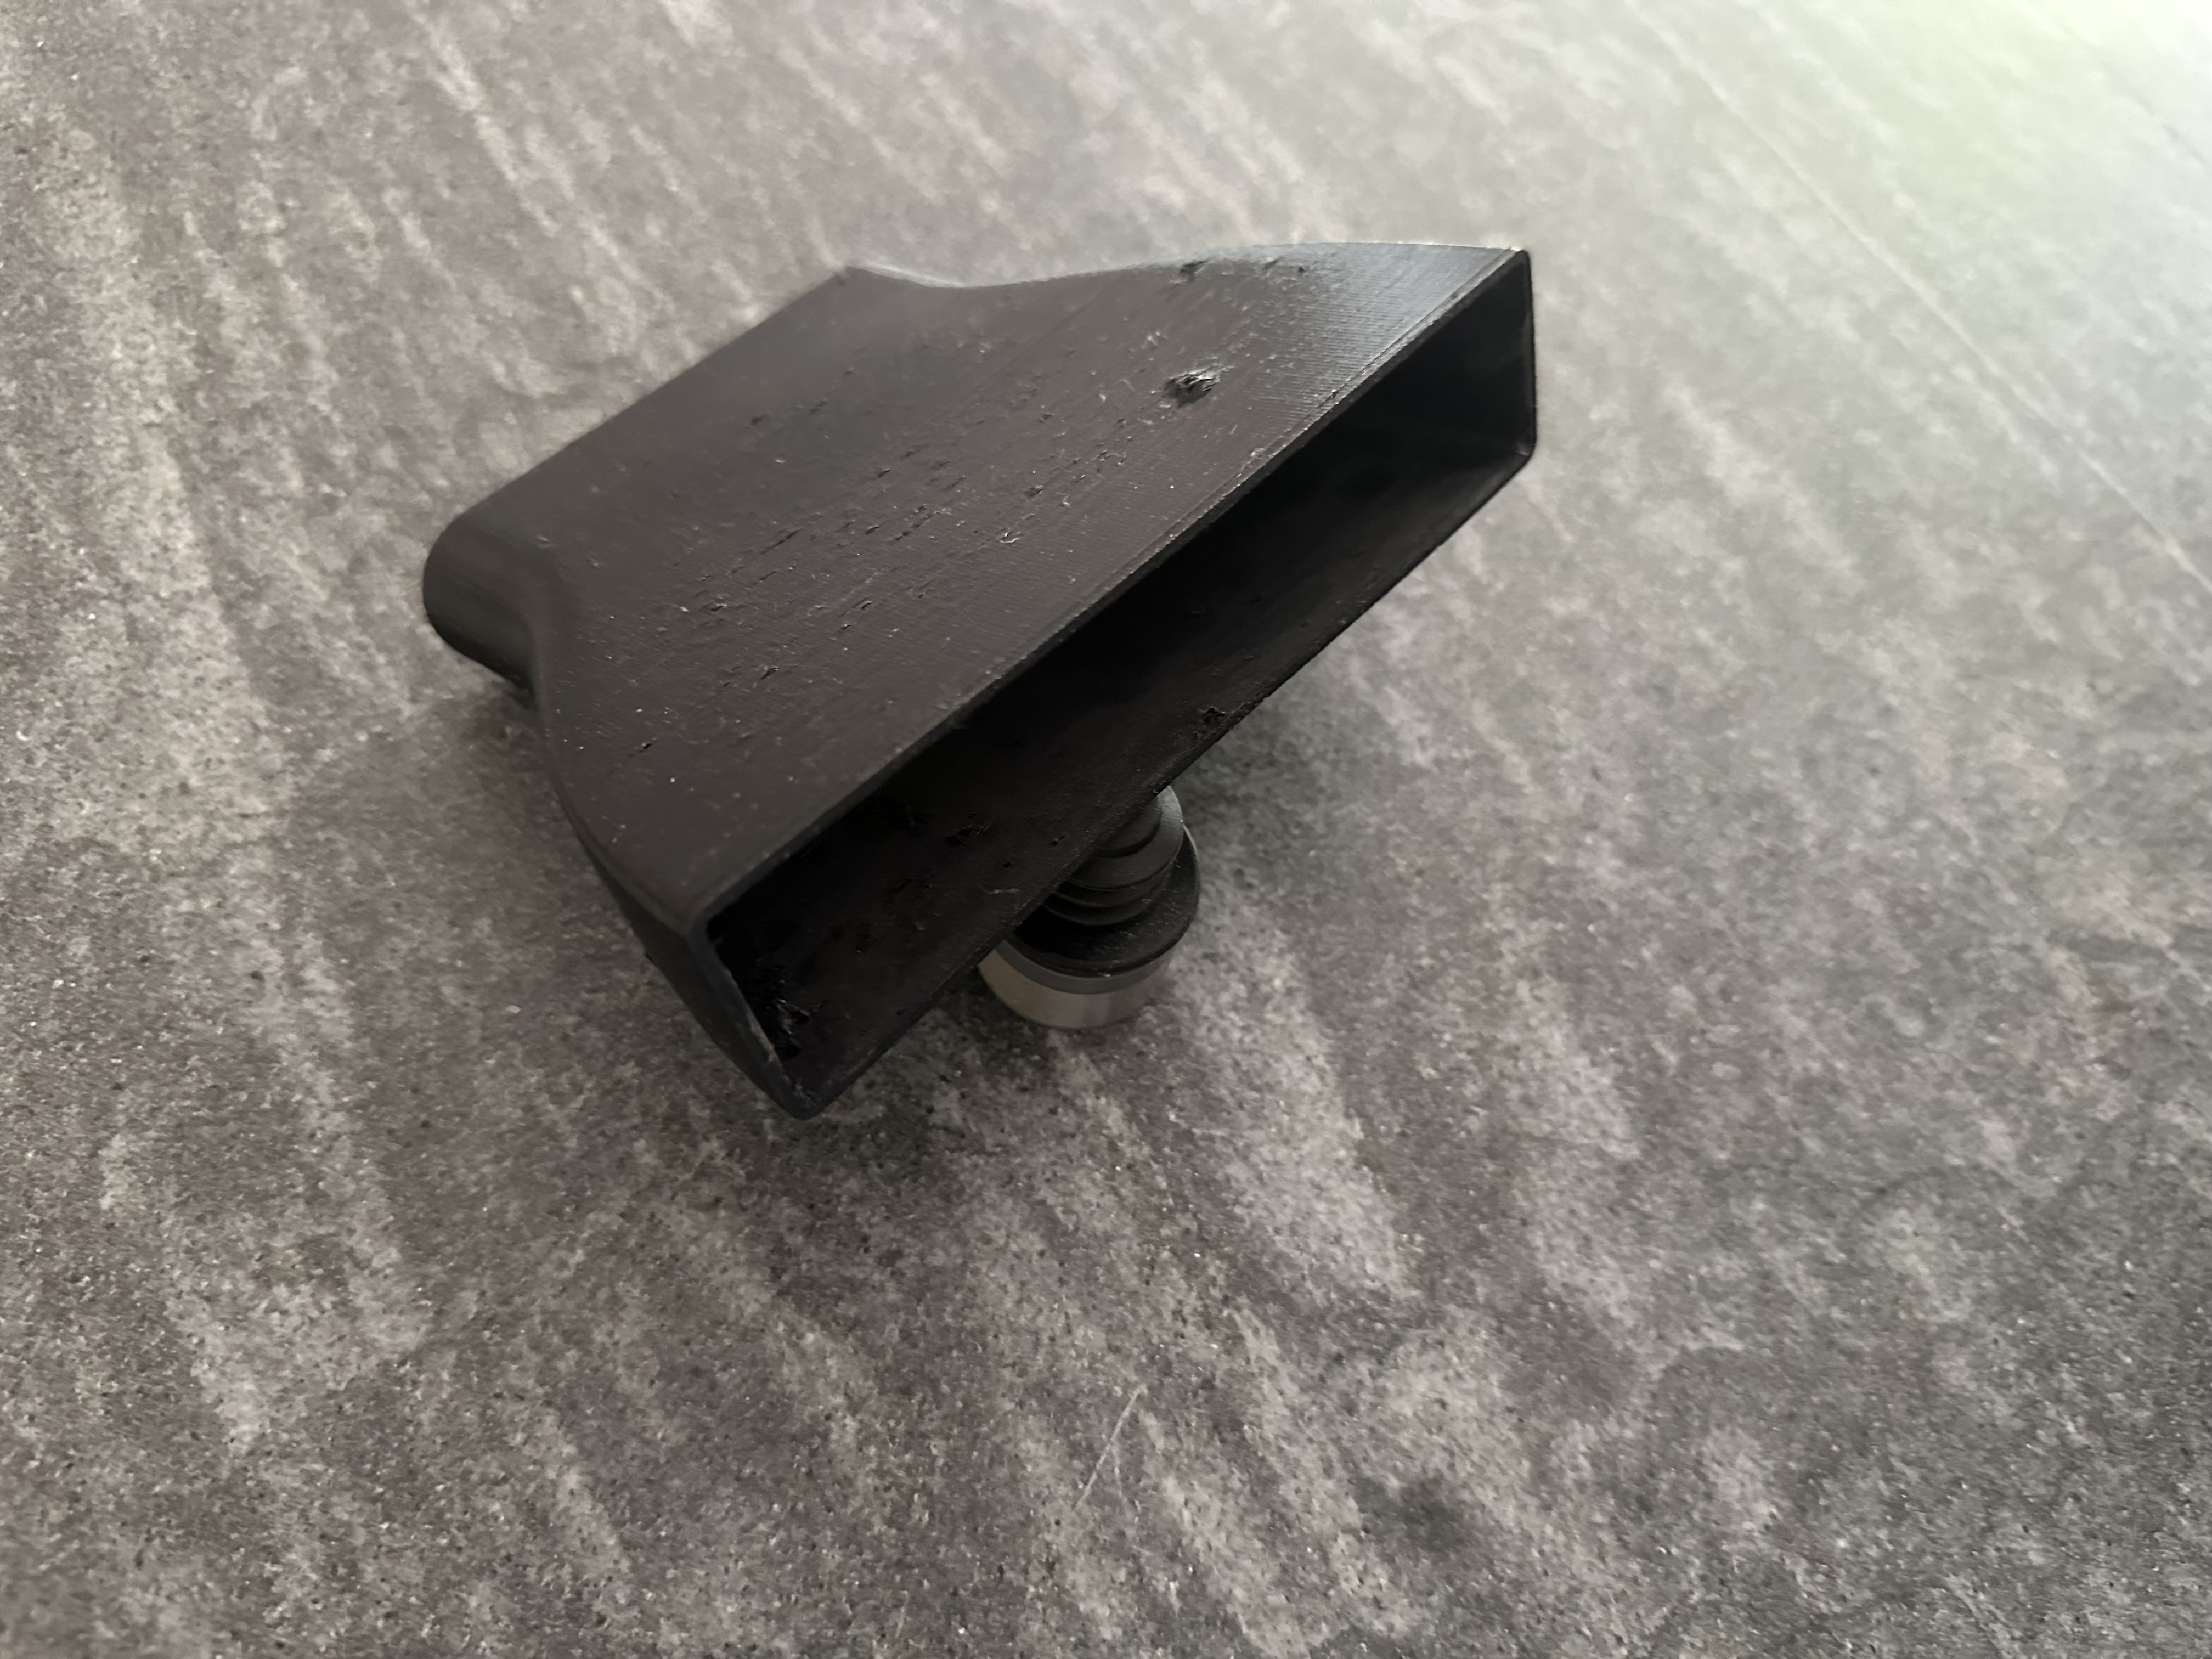
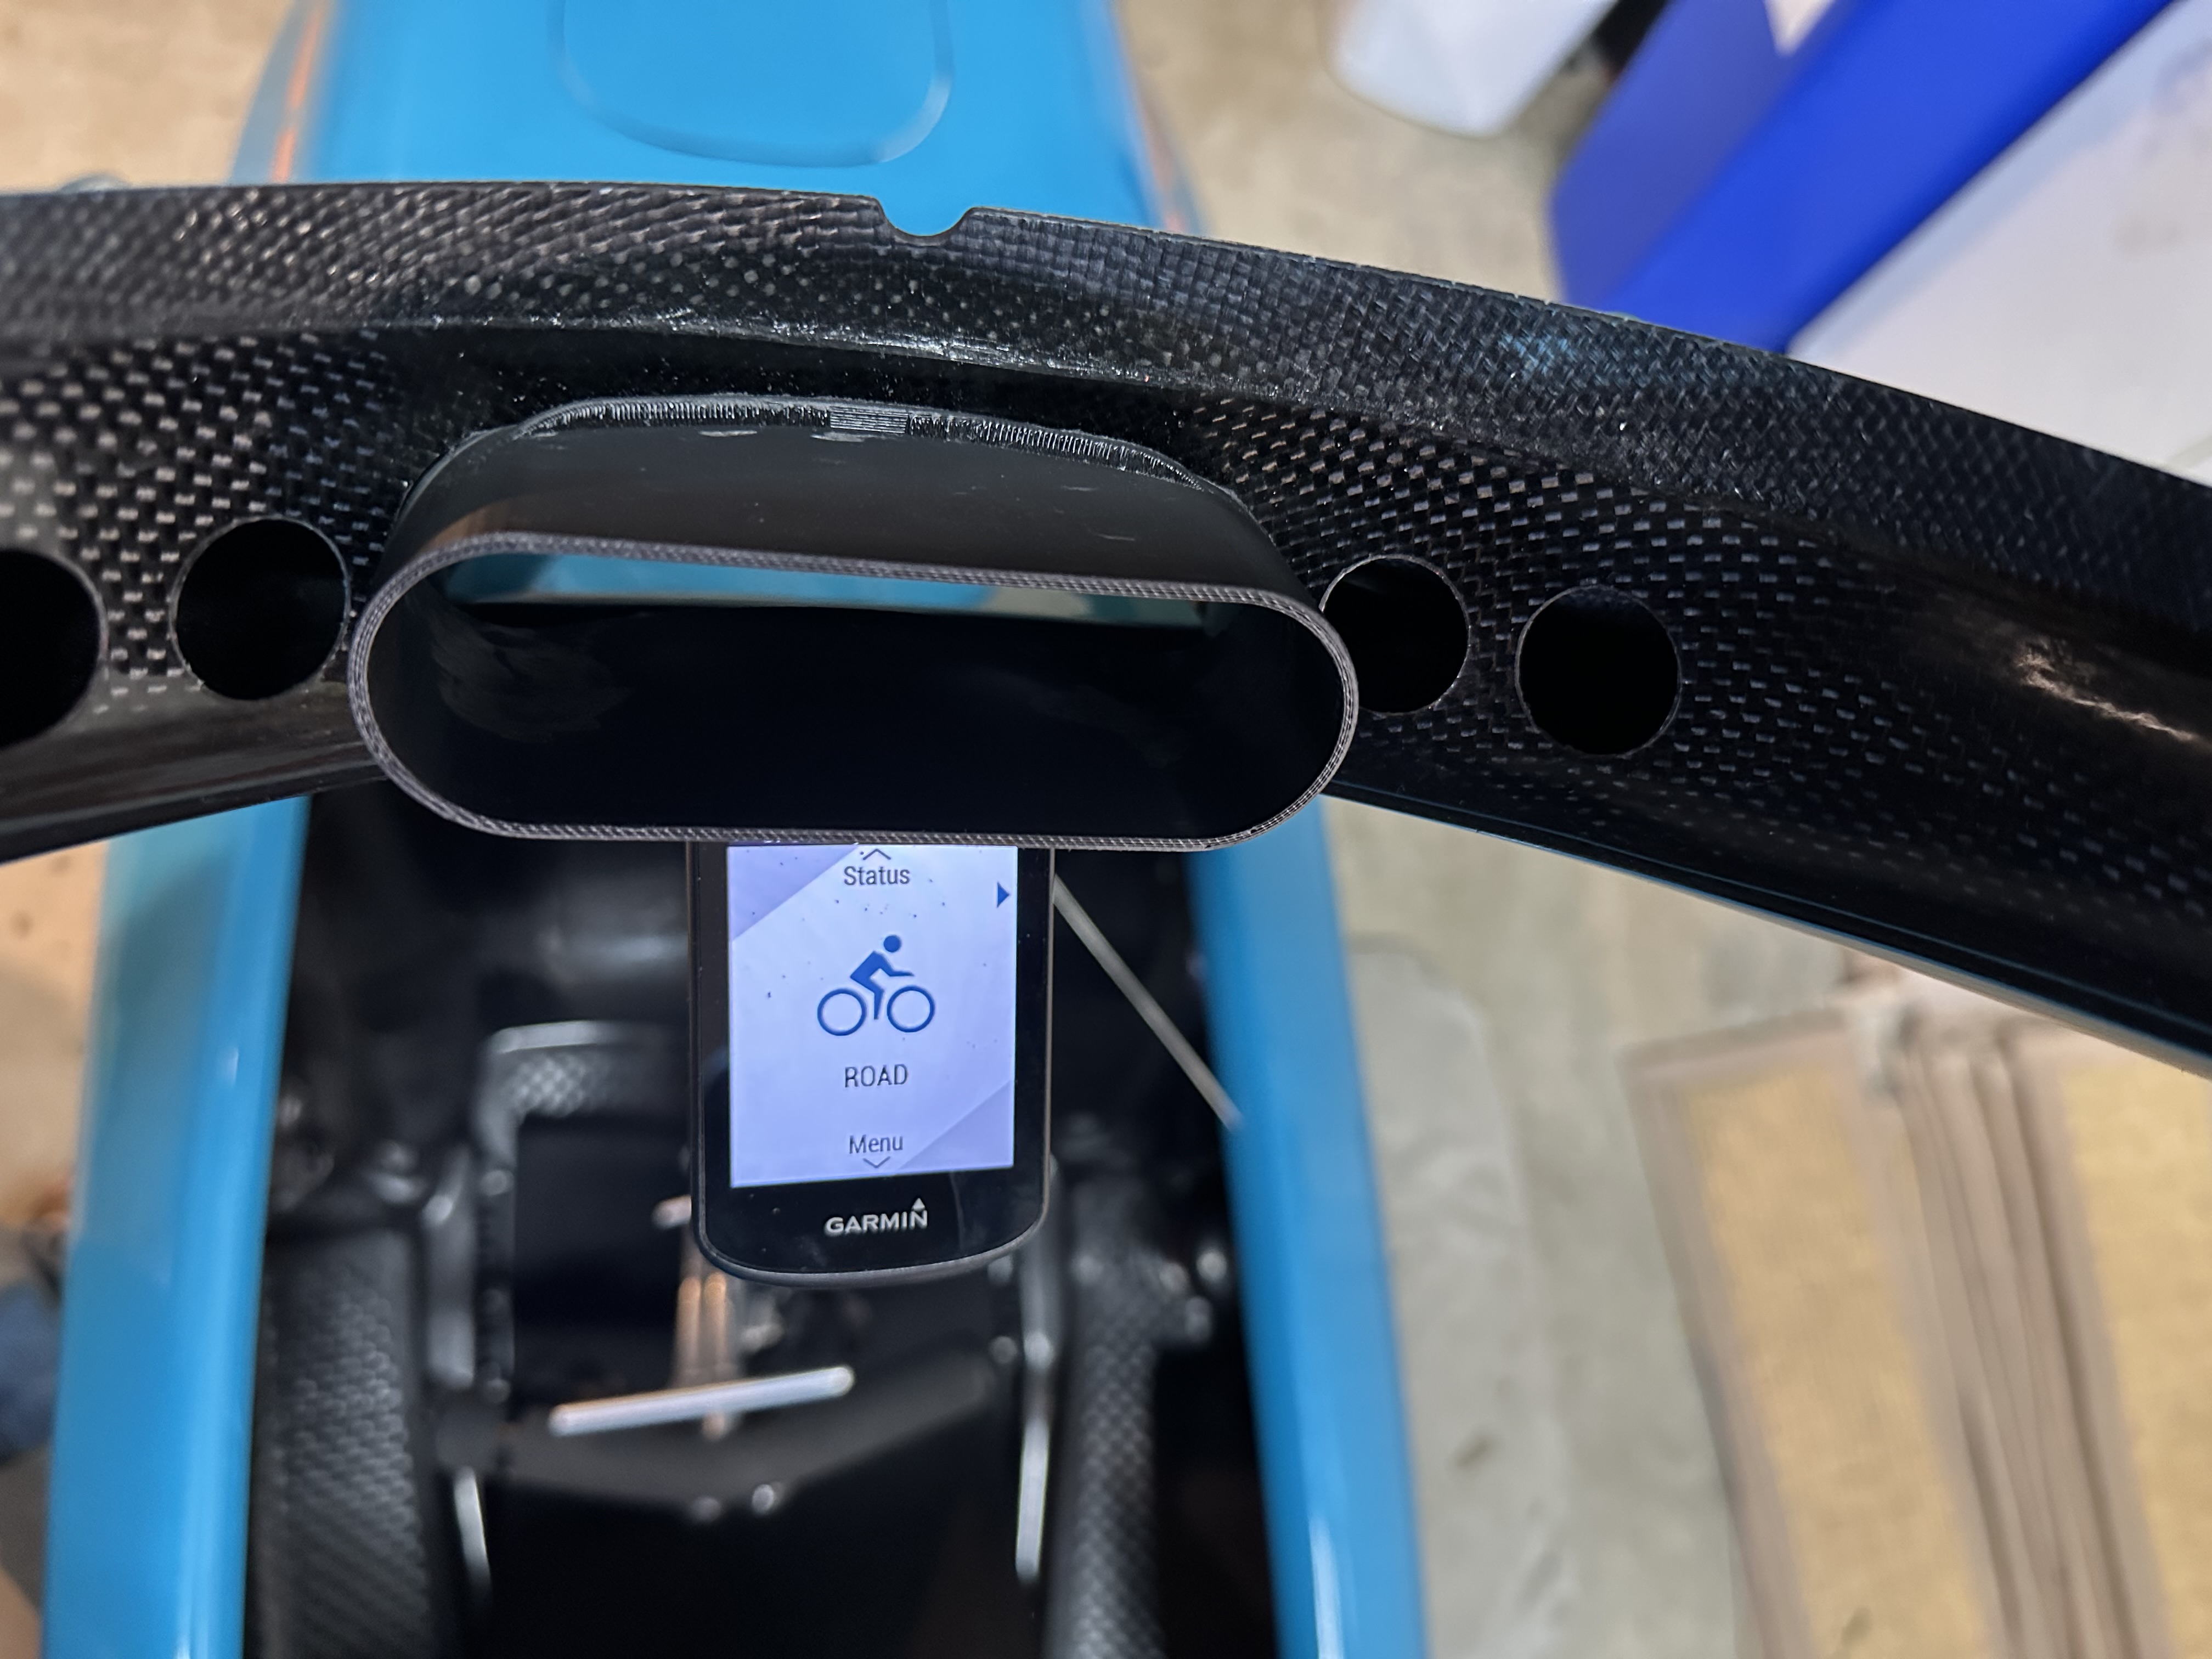
  • I’ve improved the NACA duct by installing the vertical walls of the duct, enlarging the outlet slot and adding ducting from the NACA duct exit to the slot on the interior panel.
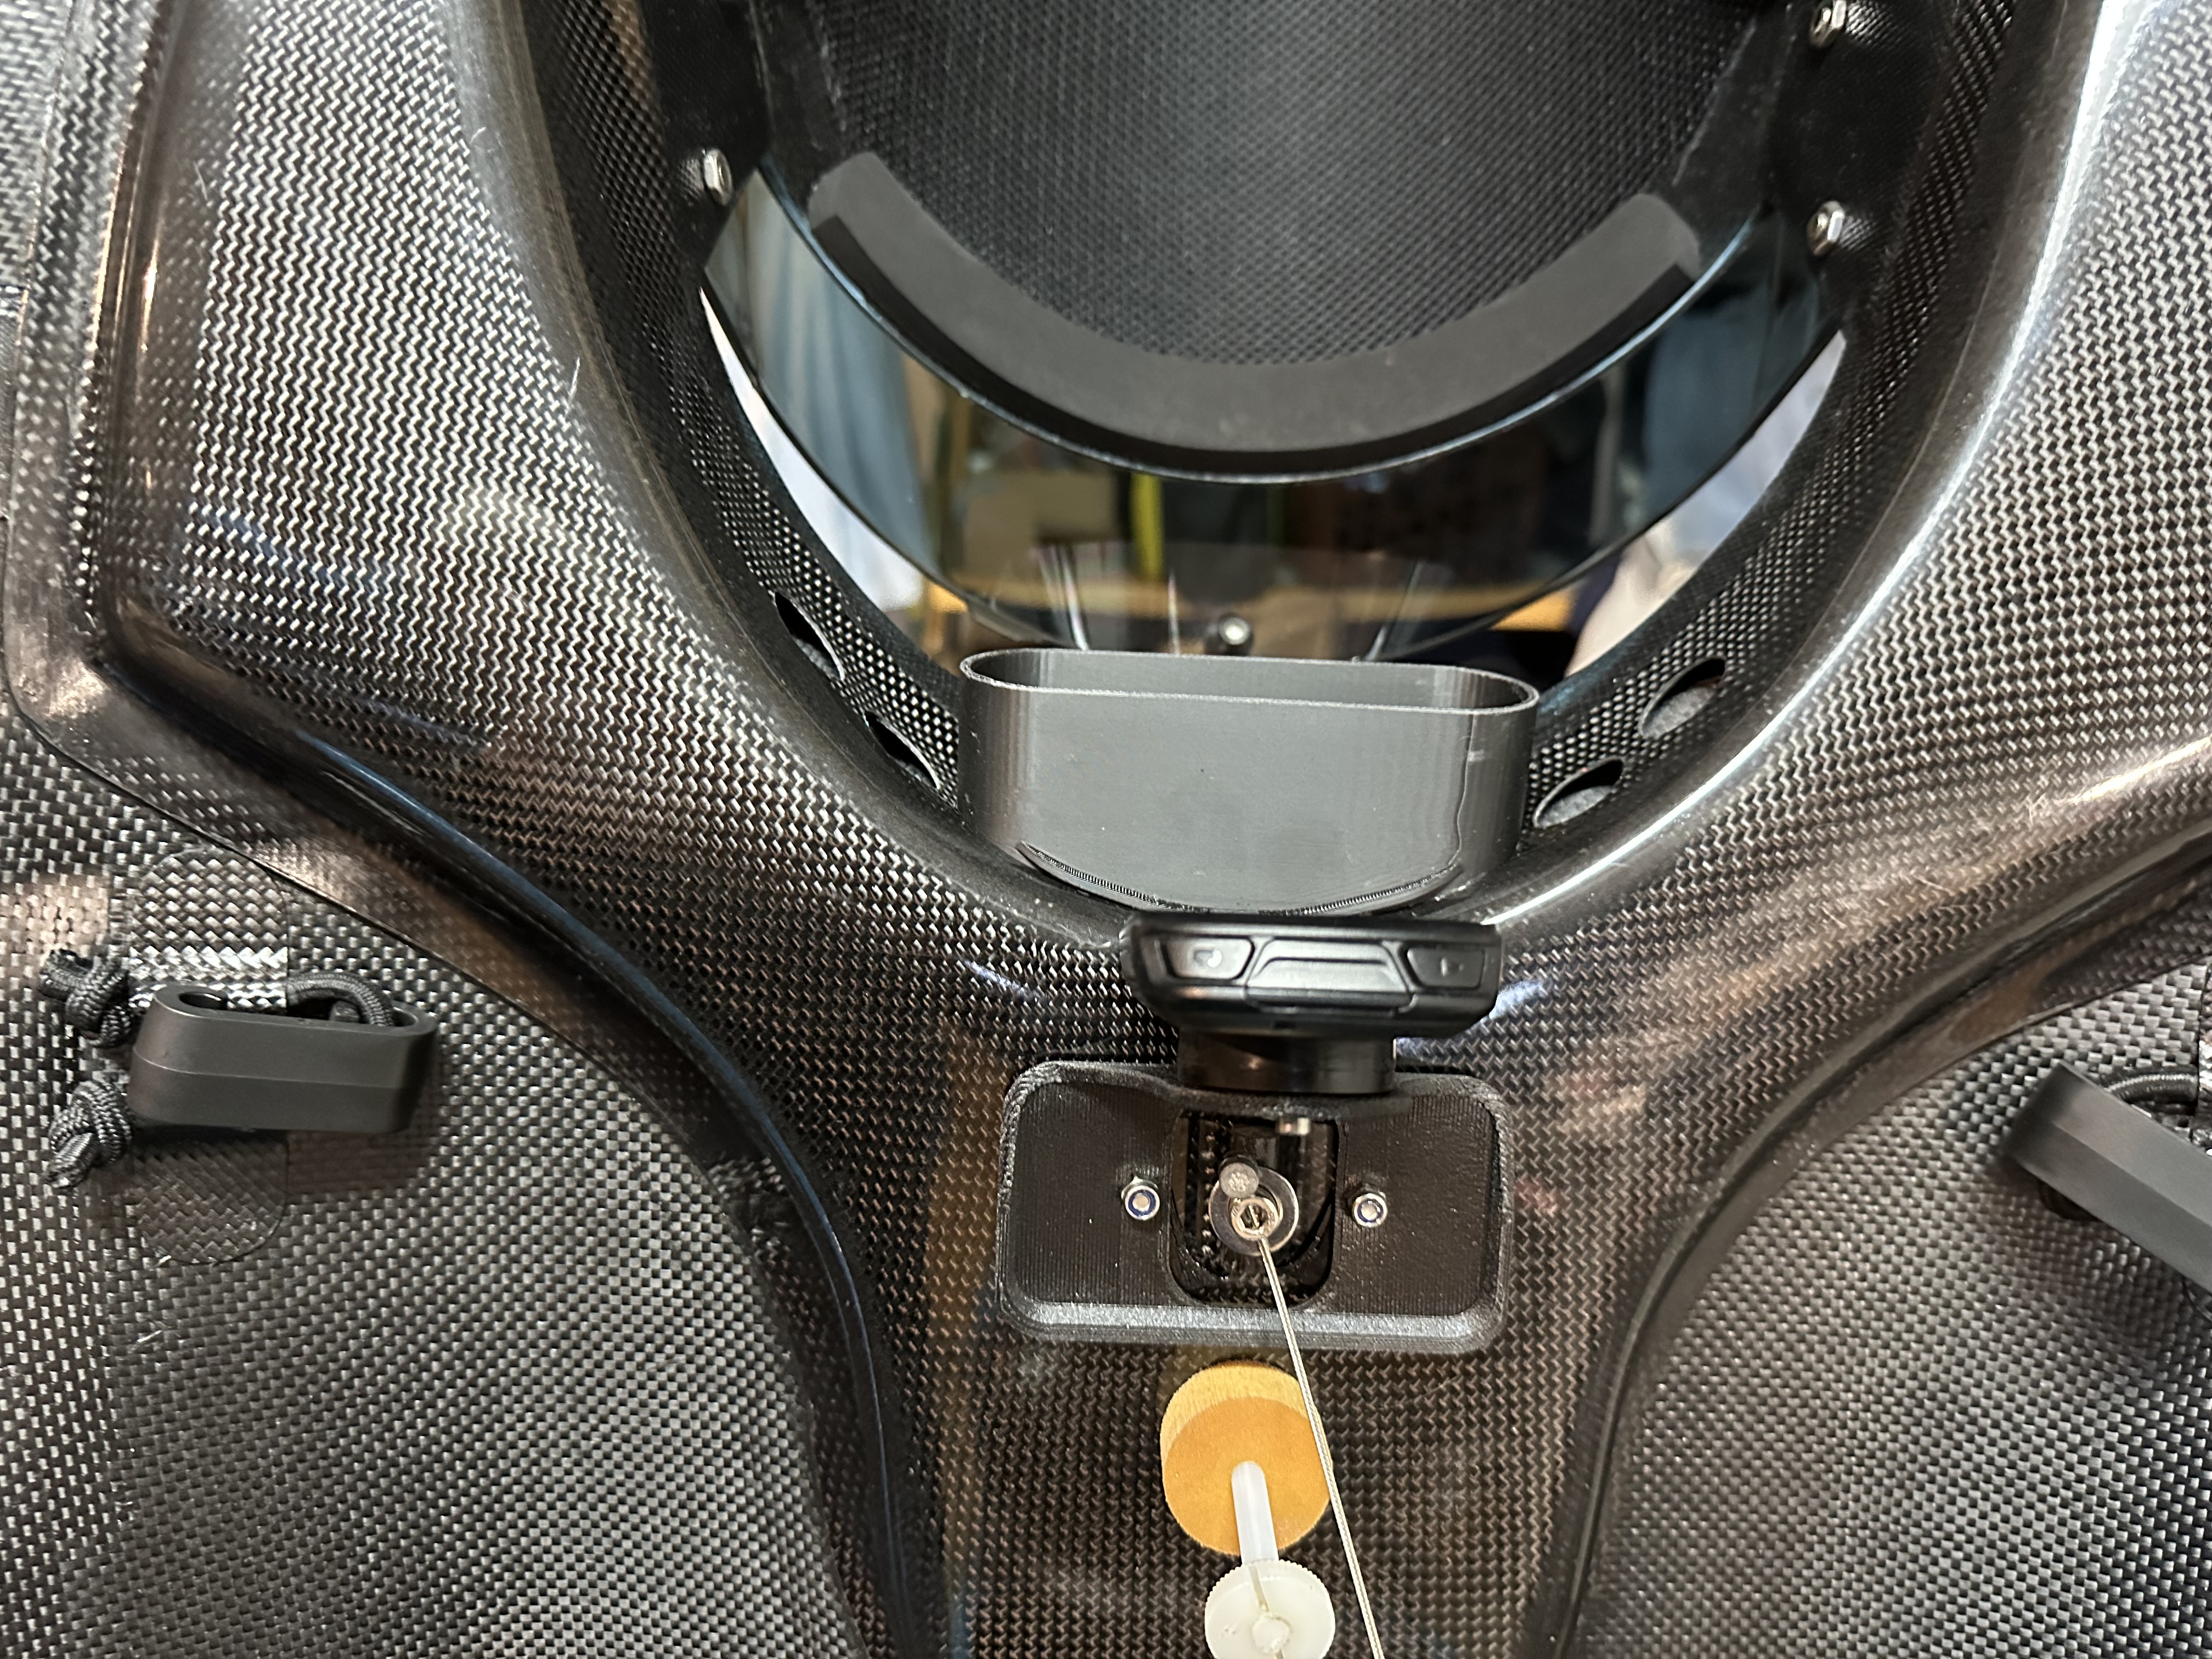
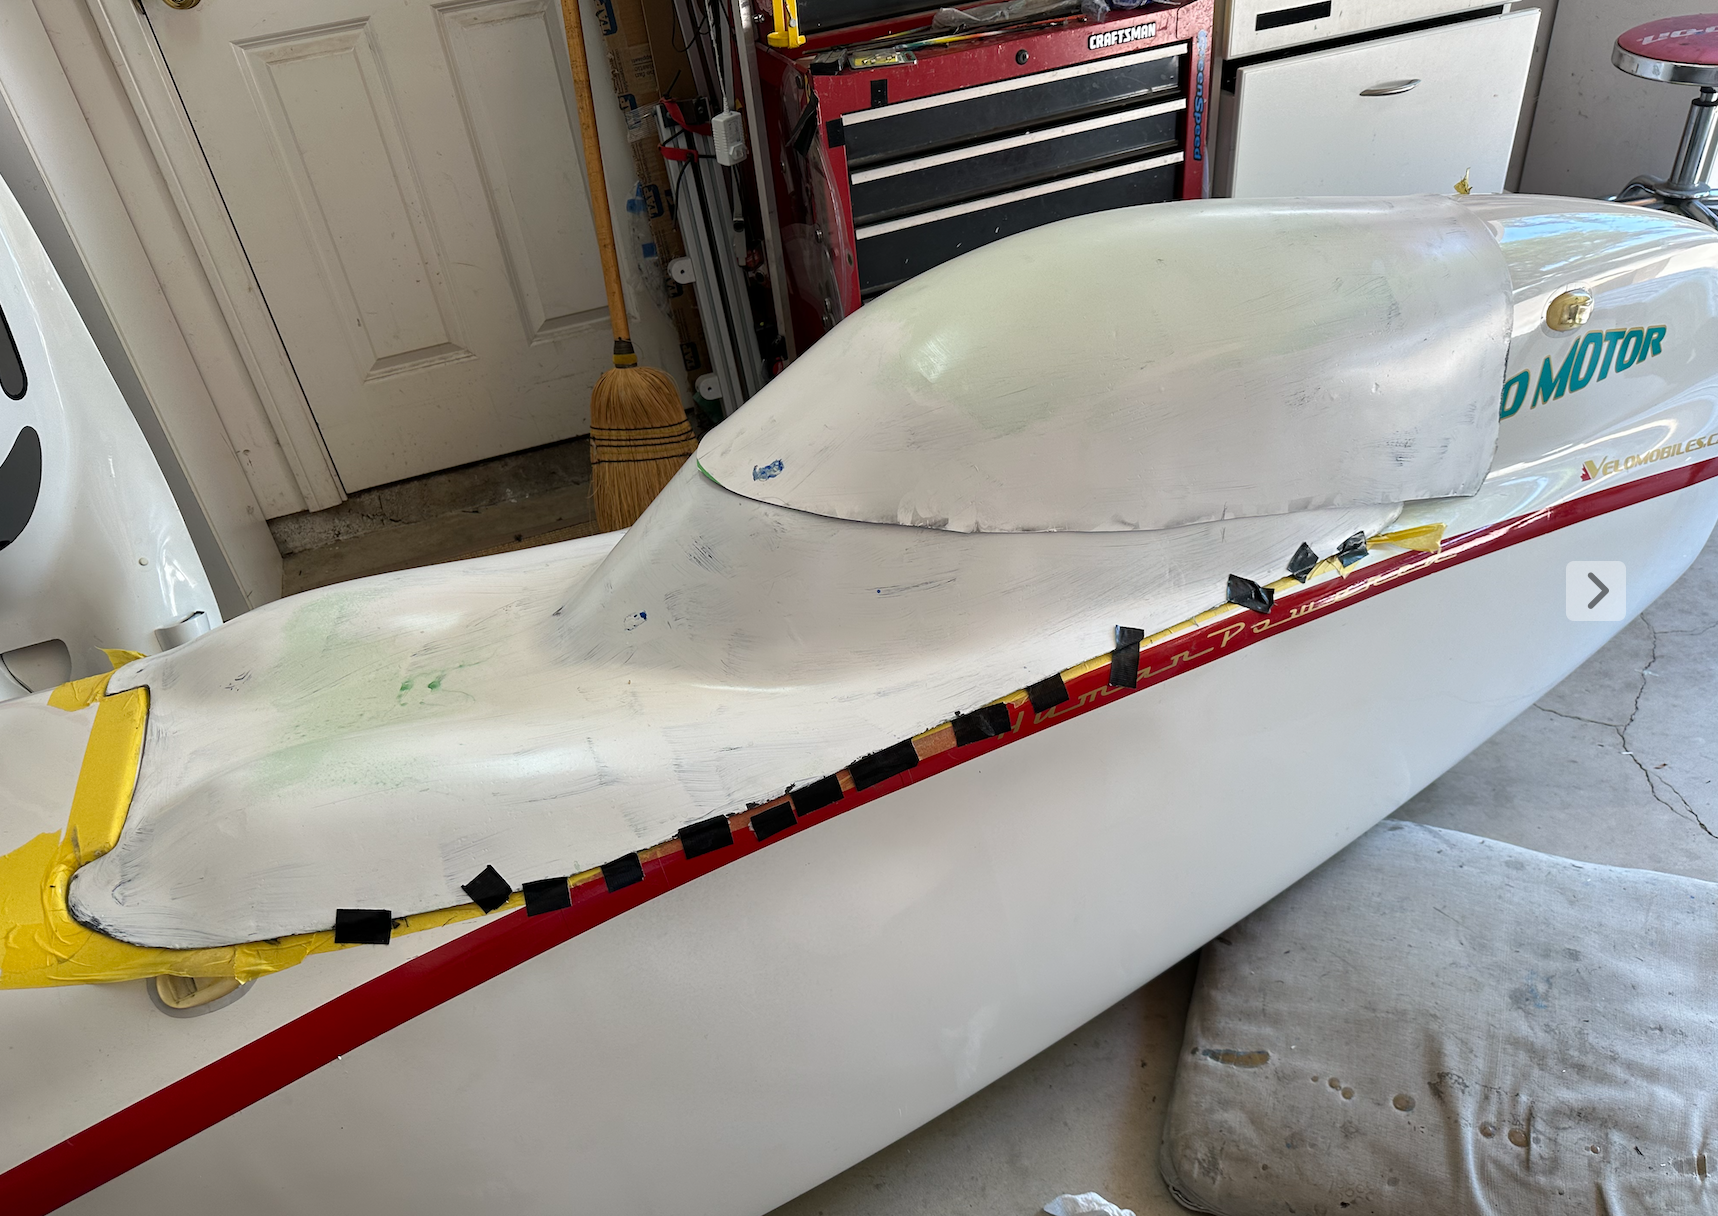
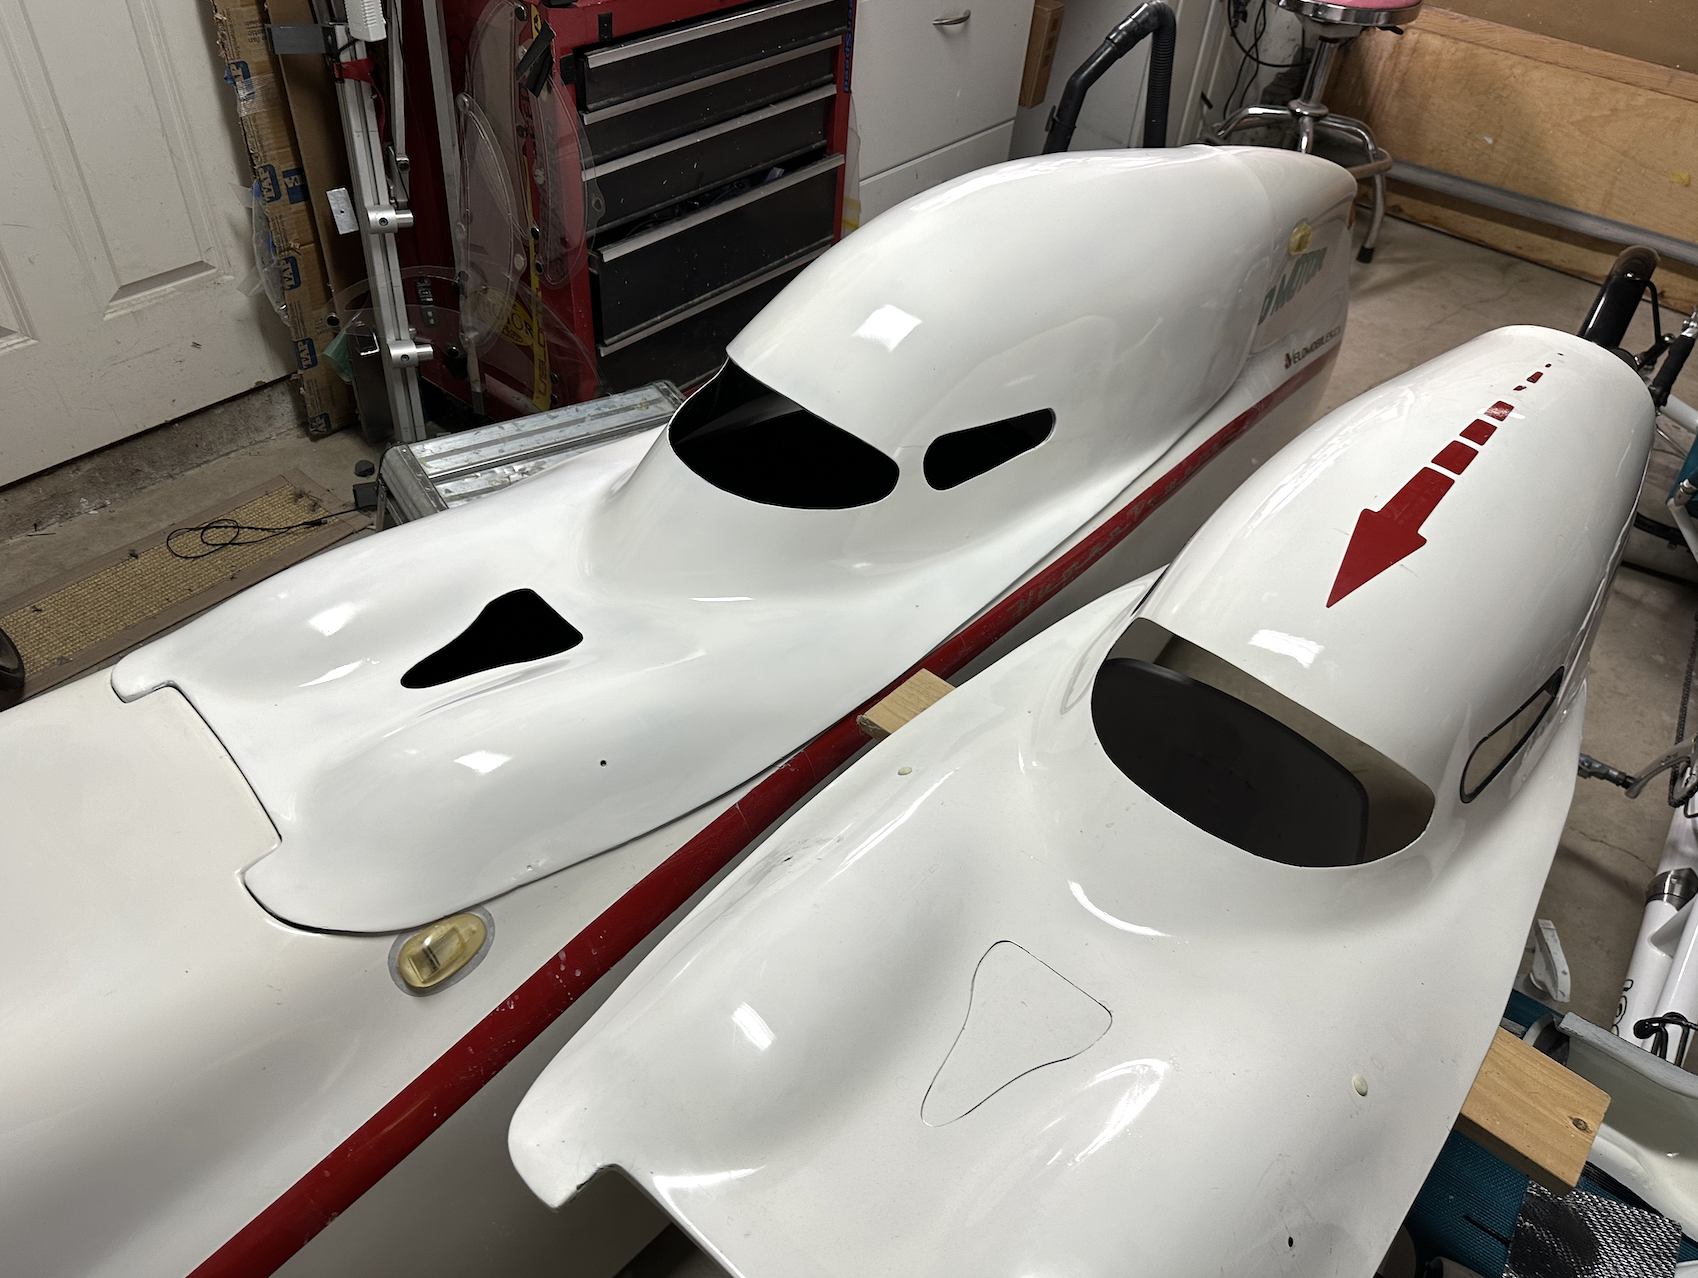
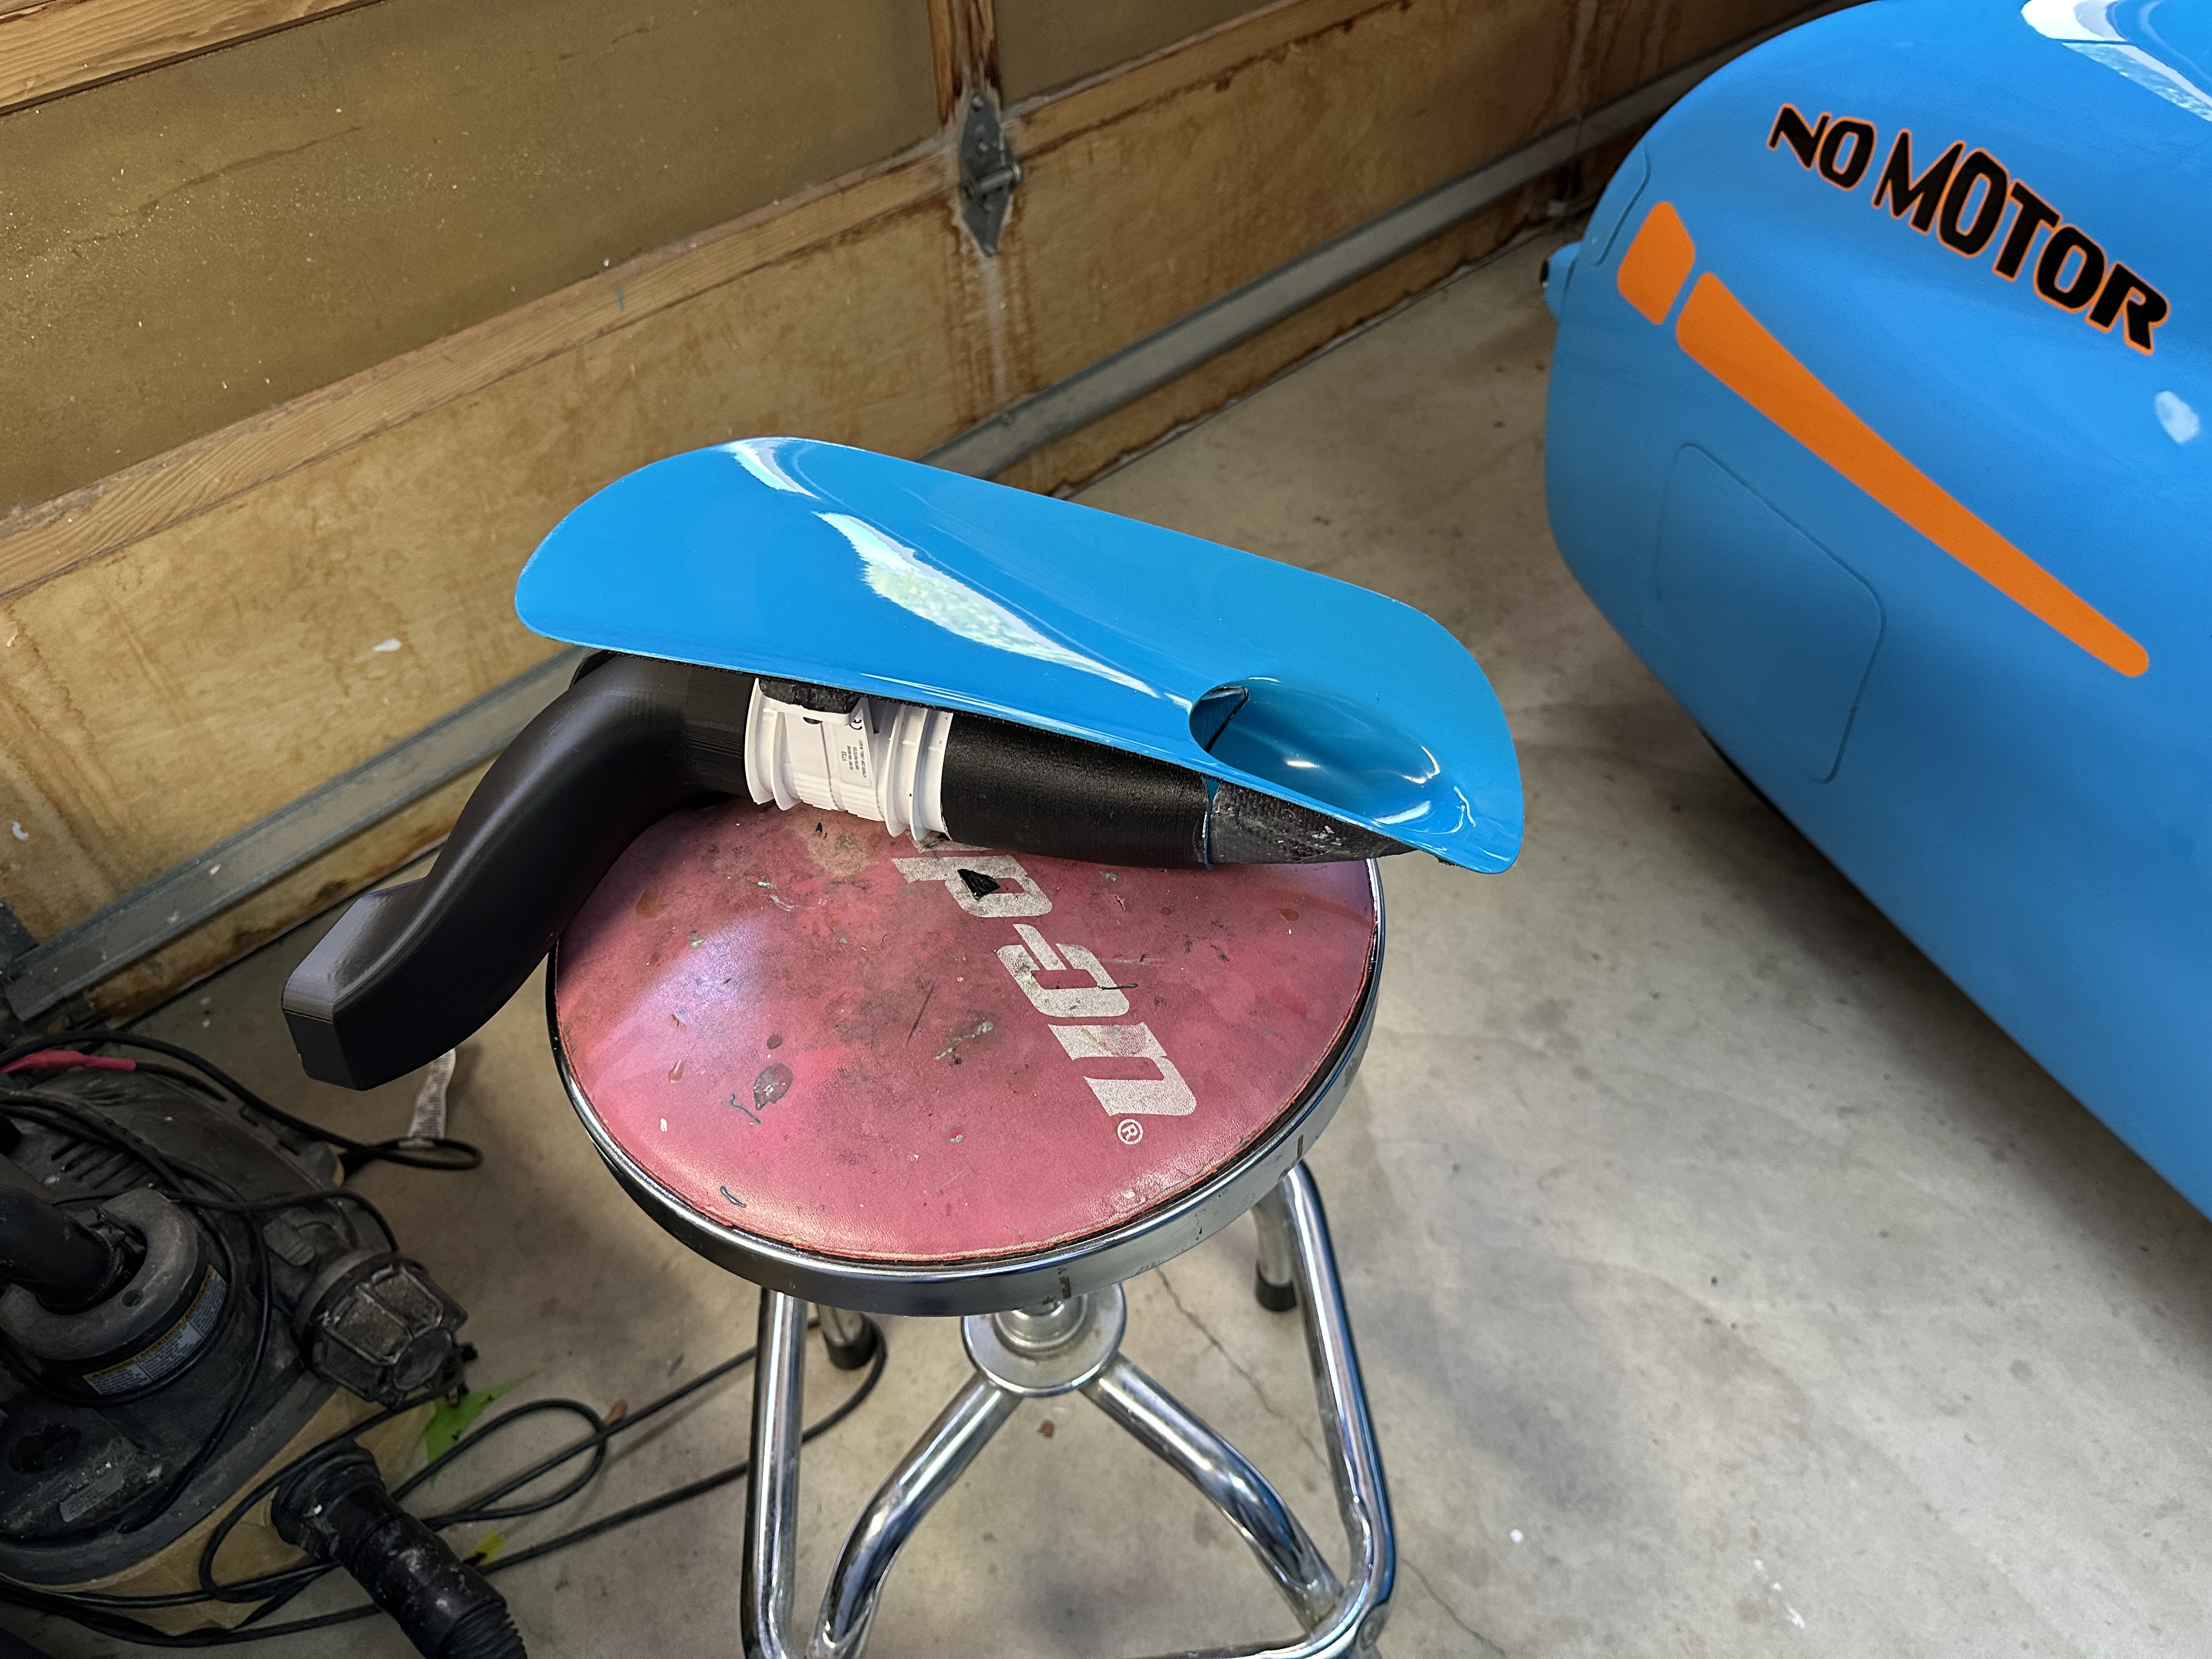
  • Built a front access cover with a vent – no fan
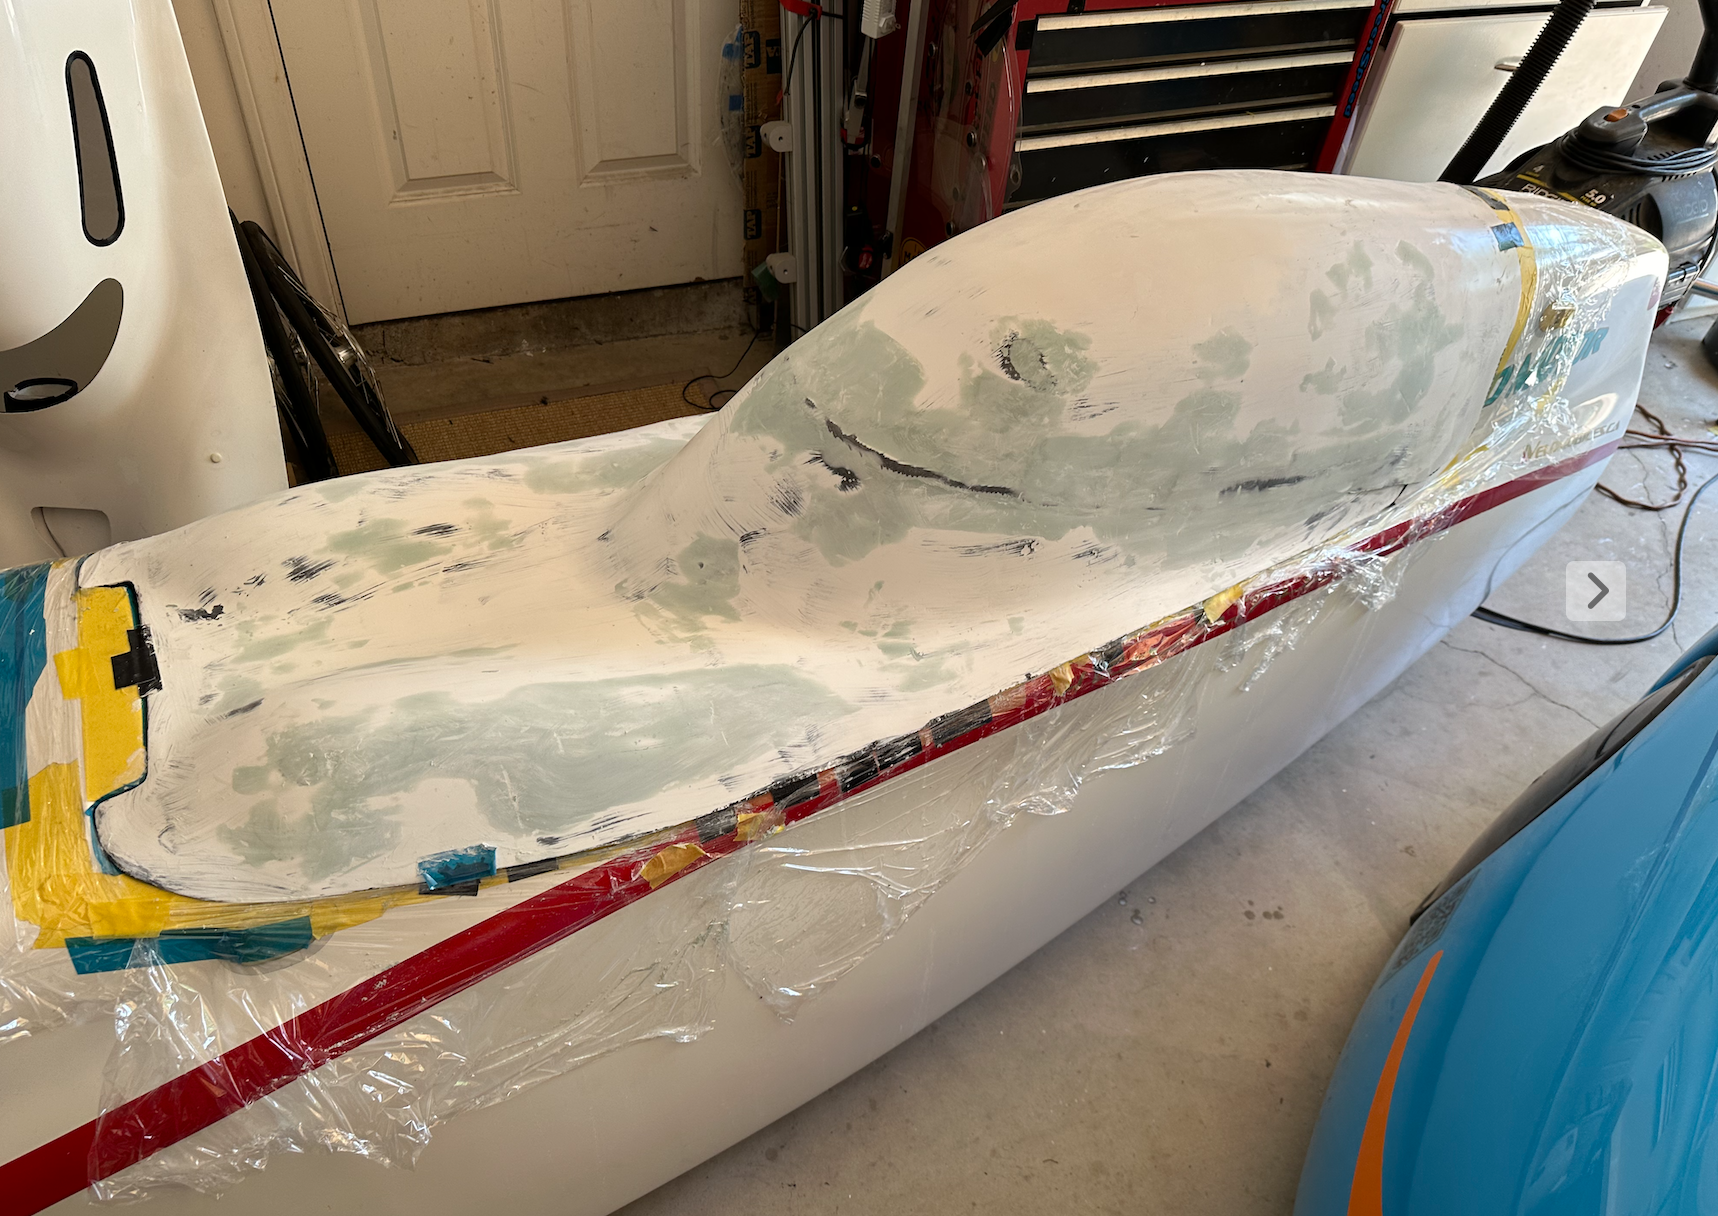
  • Built a front access panel with an inline fan and ducting
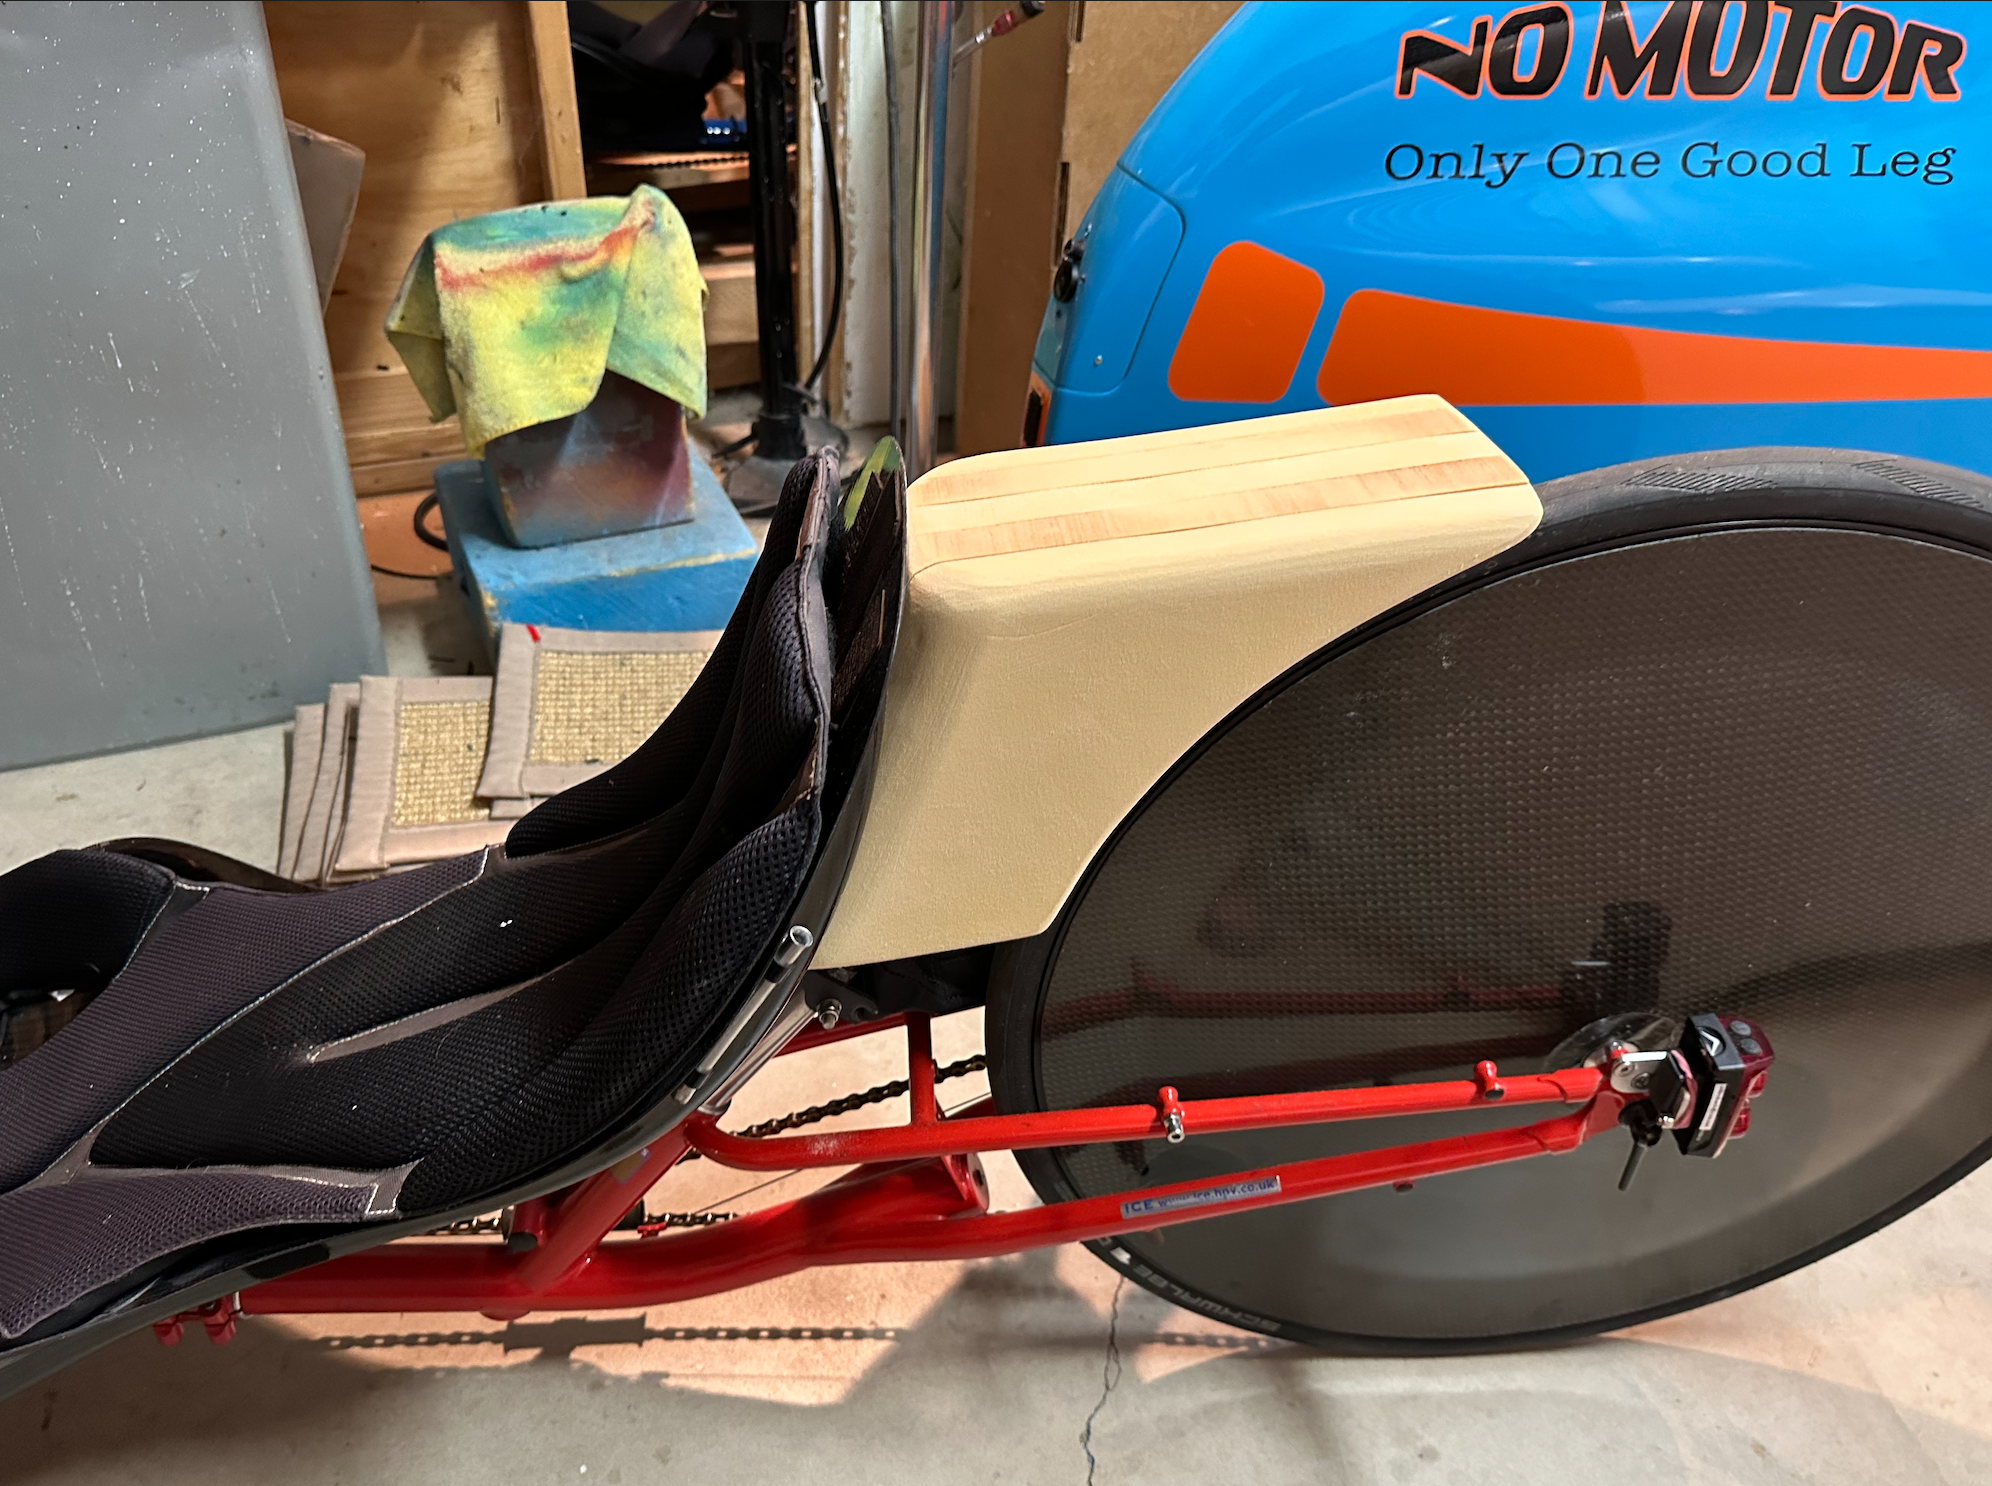
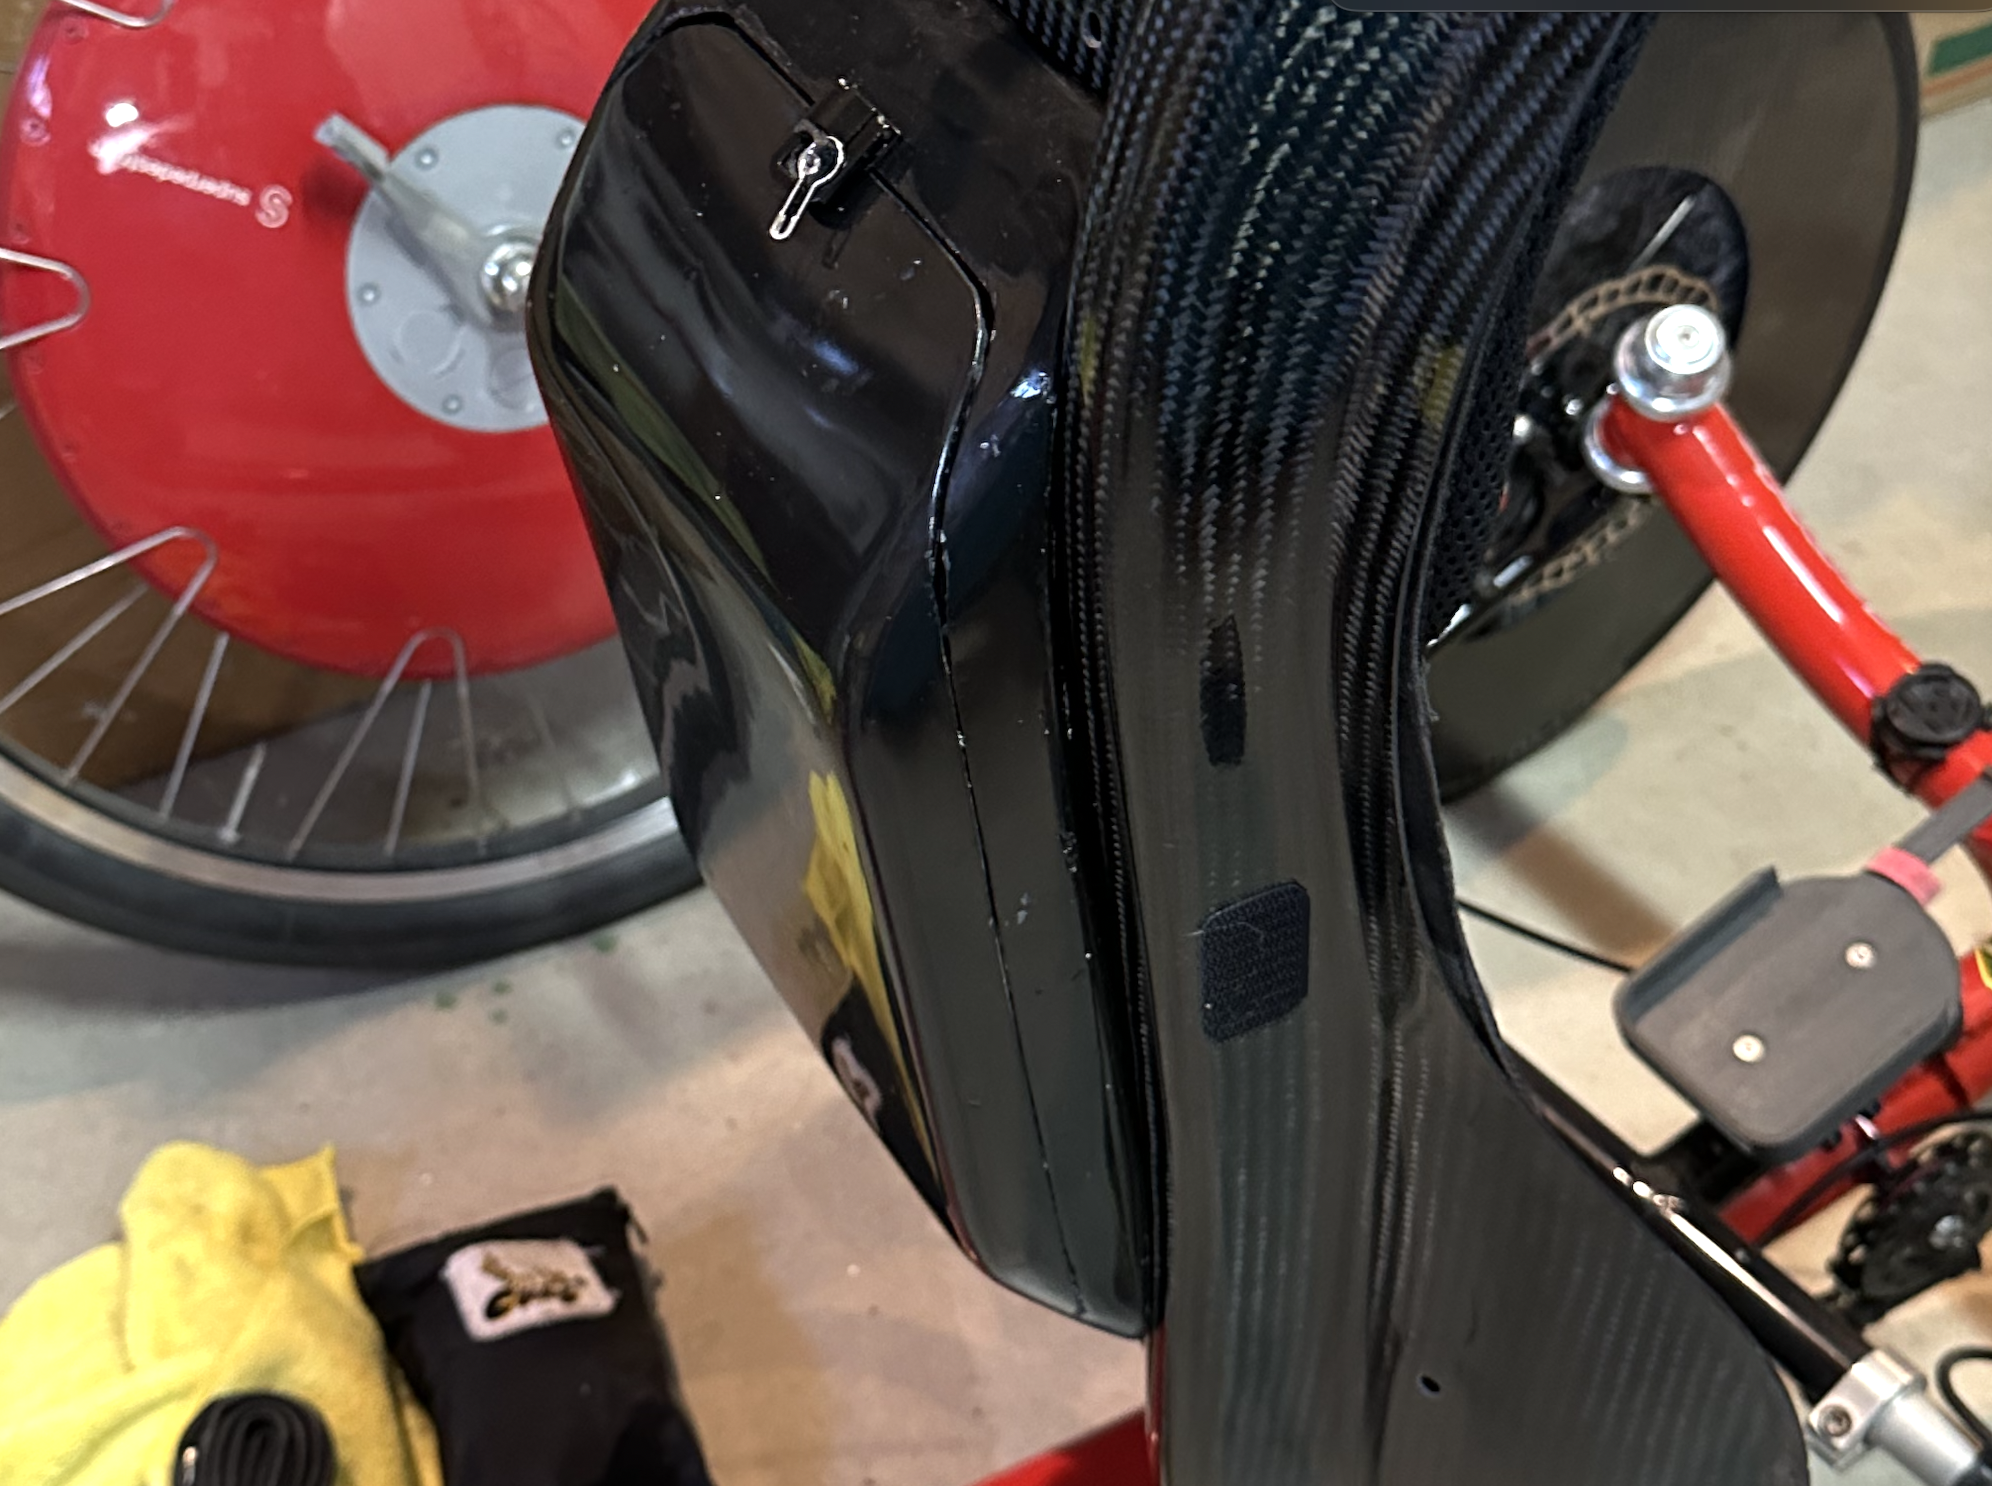
  • Replaced the solid carbon fiber panel (below the tray) with mesh material.
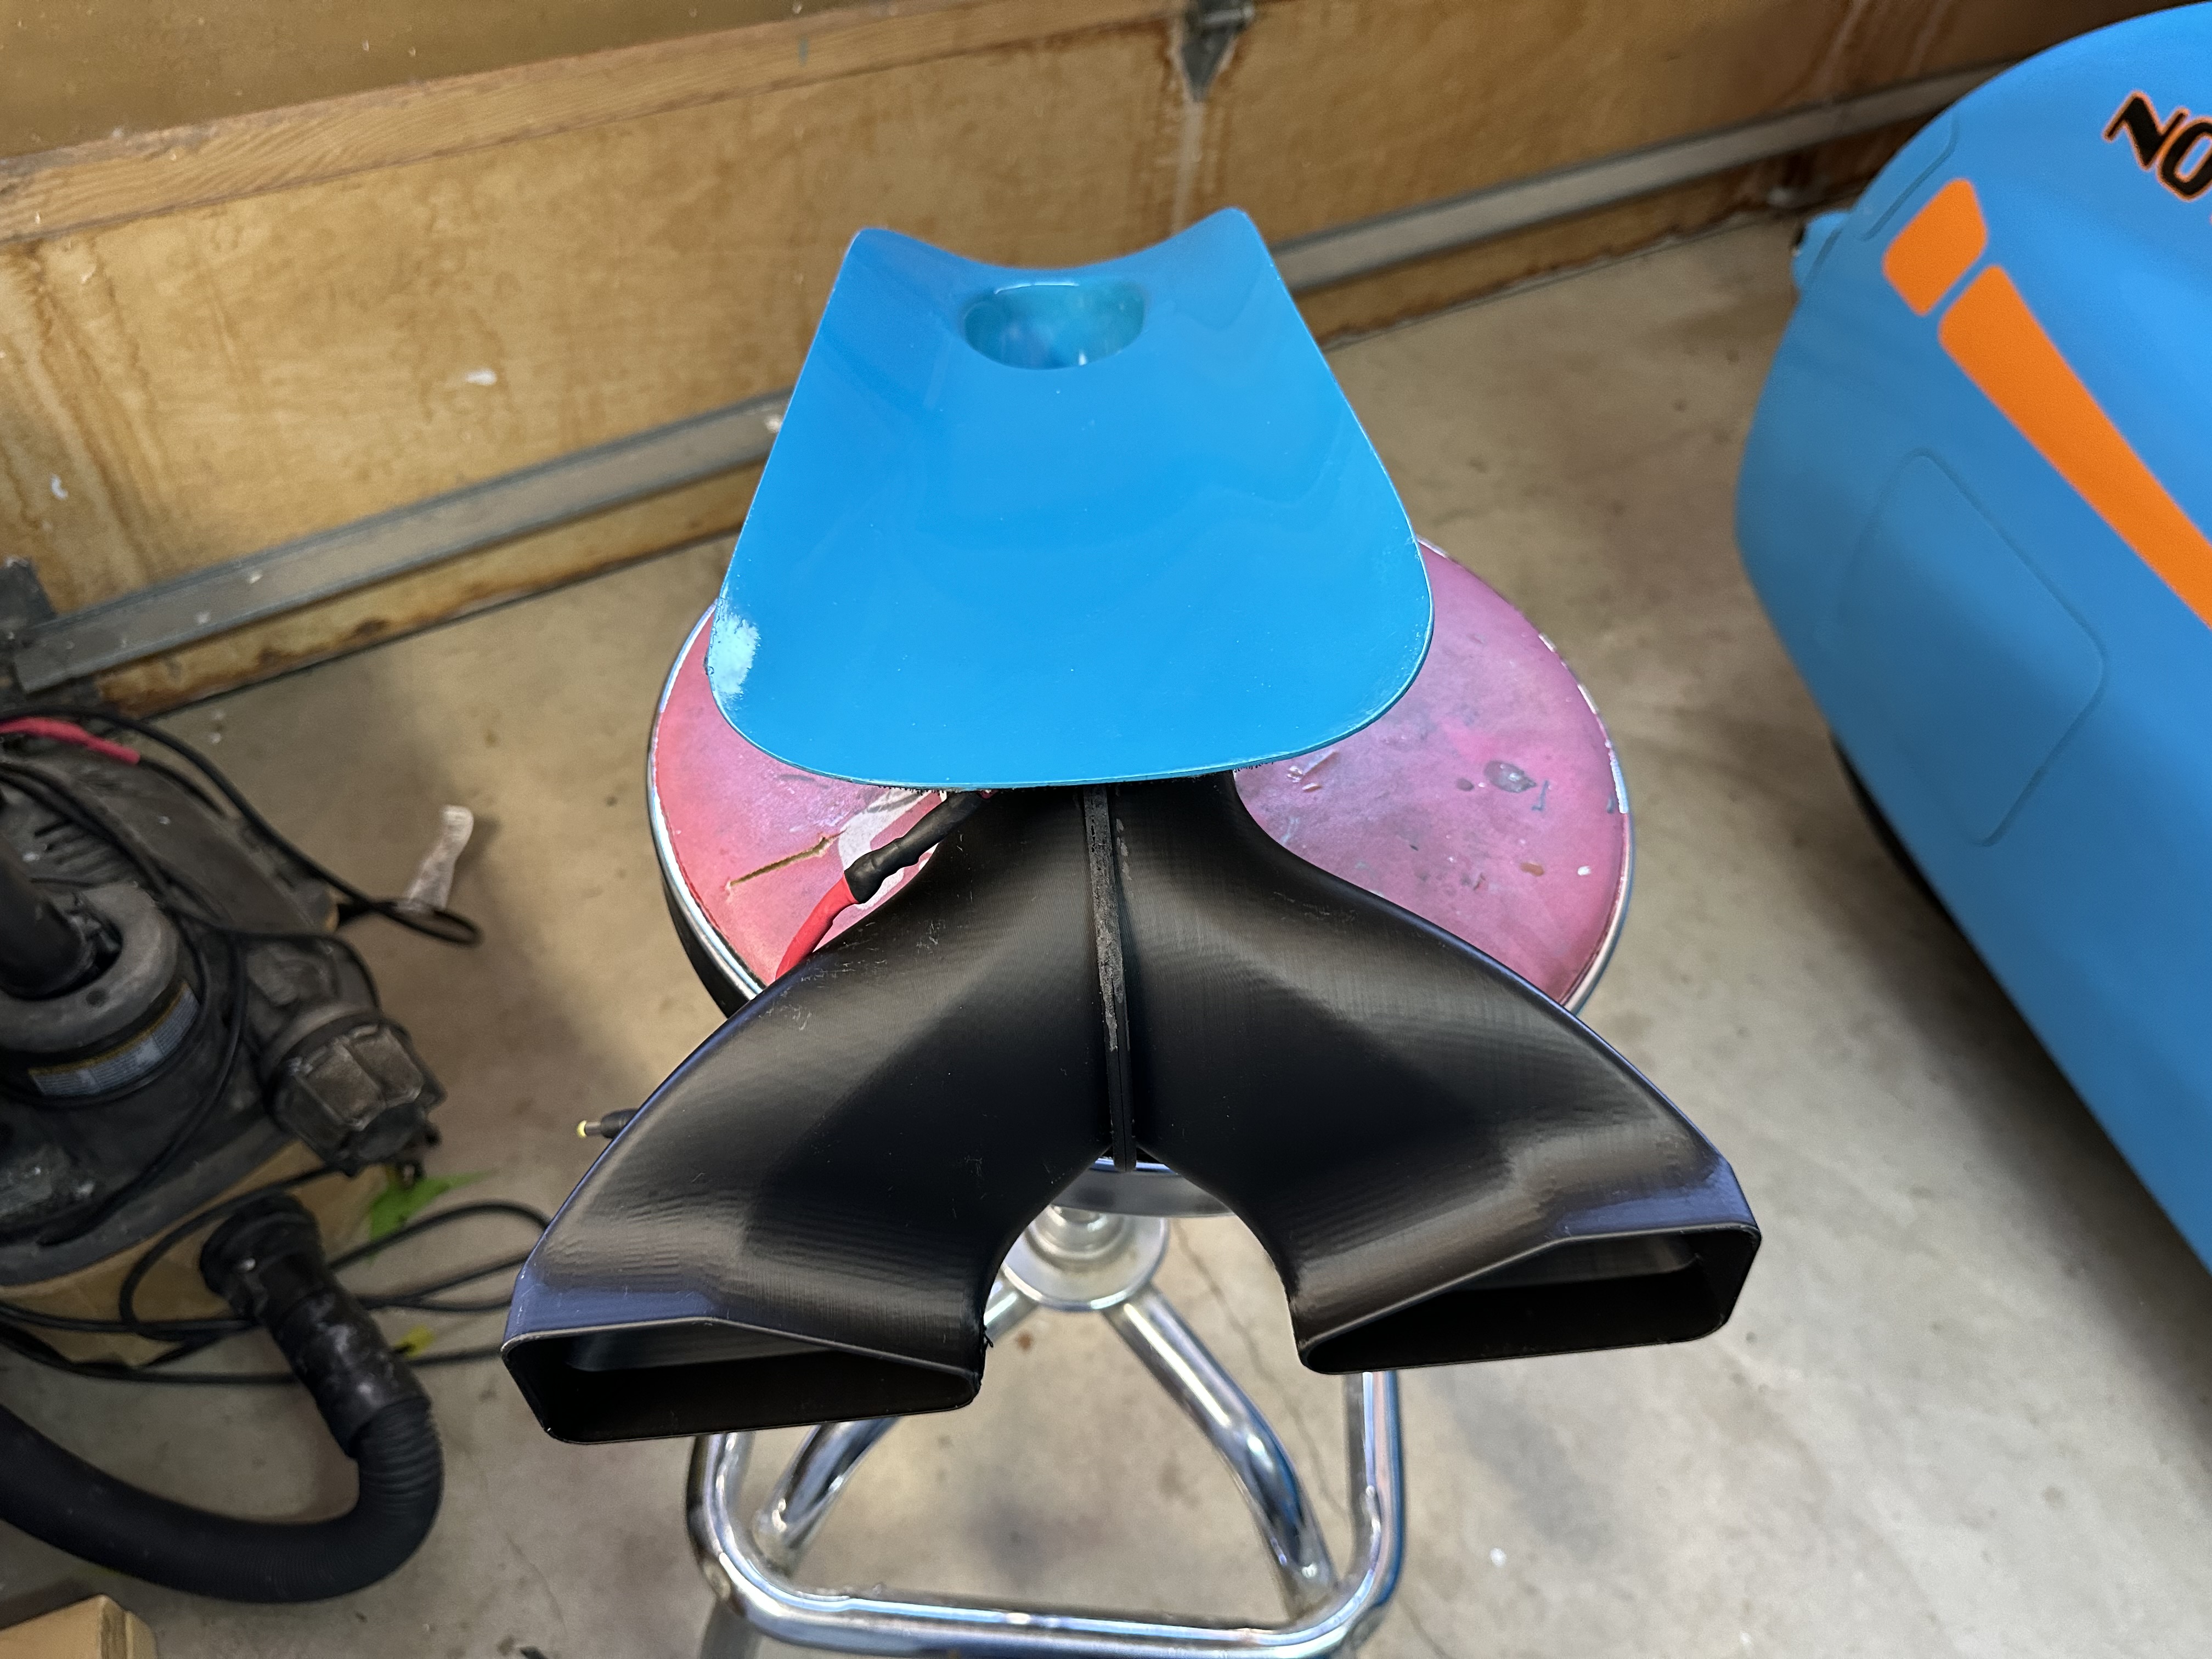
  • Built a derailleur cover with an outlet vent.
  • Added small handles to the side windows to manually open and close them.

How I tested:

  • I only tested wind speed at the NACA duct outlet into the cockpit. I attached a small wind meter in front of the NACA duct cockpit opening. For each series of tests, I established a baseline configuration, captured the windspeed for that baseline. Then I ran the individual tests, changing only one thing per test and noting the windspeed. The actual windspeed number in mph isn’t critical – only the relative amount of change vs the baseline value, positive or negative mattered.
  • I maintained 20mph speed on a flat, straight bike path for each of the tests, noting the windspeed measurement for each test.
  • No consideration was given to the aerodynamic costs of any of these changes.

Baseline Configuration

  • Race hood in place
  • Visor down
  • Modified NACA duct fully open
  • Center vertical strut air opening fully open
  • Side windows in place
  • Stock front access cover (no vent, no fan)
  • Solid carbon fiber panel below tray
  • Travel at 20mph on straight, flat bike path for approximately 1/8 mile out and 1/8 mile back

Test Series A: The Baseline meter reading : (actual speed isn’t important – only the delta)

  1. Visor fully open
  2. Hood manually pushed up forming an approximate gap of 1″
  3. Left side window manually pushed out forming an approximate gap of 1″
  4. Both side windows pushed out
  5. No side windows
  6. Vented derailleur cover with mesh
  7. Vented derailleur cover with no mesh, no panel

Test Series B: Repeat the tests with same baseline but access cover with vent but no fan installed

  1. Visor fully open
  2. Hood manually pushed up forming an approximate gap of 1″ – meter reading
  3. Left side window manually pushed out forming an approximate gap of 1″
  4. Both side windows pushed out
  5. No side windows
  6. Vented derailleur cover with mesh
  7. Vented derailleur cover with no mesh, no panel

Test Series C: Repeat the tests with same baseline but access cover with fan at full speed

  1. Fan at full blast
  2. Visor fully open
  3. Hood manually pushed up forming an approximate gap of 1″ – meter reading
  4. Left side window manually pushed out forming an approximate gap of 1″
  5. Both side windows pushed out
  6. No side windows
  7. Vented derailleur cover with mesh
  8. Vented derailleur cover with no mesh, no panel

Discussion:

Based on the tests above, there were some observations that were consistent across all 3 scenarios.

  • The NACA duct provides decent air flow when the side windows and visor are closed. It improves with partially opened side windows. The more they’re opened, the more improvement was seen up to a point.
  • The NACA duct air flow also improves dramatically by pushing up the trailing edge of hood.
  • Opening the visor reduces the NACA duct air flow to almost nothing. The air flowing through the visor area was much greater than the maximum air flow through the NACA duct.
  • Experiments with removing the panel below the tray with modifications to the derailleur cover (and even removal of the cover) had little effect on the NACA duct air flow. Either my theory about the unnecessary restricted access to the tail vent holes was wrong or my proposed fix was not effective.
  • Running the fan reduced the NACA duct air flow to almost nothing. The fan did produce a noticeable stream of air to my legs. Opening the side windows while the fan was running restored the NACA duct air flow back to the moderate levels.
  • Running the vent-only front cover had little effect on the NACA duct air flow, although it produced a small but noticeable air flow to my legs.

Take Aways:

It seems that the BULK could benefit from providing more capacity to flow air into and out of the cockpit. Keep in mind that the aerodynamic penalties for doing so have not been considered yet.

Input: On the input side, opening up the NACA duct outlet and adding more shape to the NACA duct is worth while. The no-fan duct panel is worth pursuing beyond the simple panel shown above. The fan panel is a question mark. While the velomobile is in motion, it doesn’t add much. Its main utility comes into play on slow climbs or waiting at stop lights.

Output: The airflow into the cockpit improves dramatically by lifting the hood’s trailing edge or by opening the side windows. I’m not a fan of lifting the hood. Improving the mechanism of opening and closing the side windows seems like a good path to take.

Future Mods?

Front Access Panel with Vent: The current vented access panel just has a short tube extending from the opening. This dumps air into the cockpit well forward of the rider. I will make a panel with a longer tube that leads to the split ducting to deliver the air flow closer to the rider.

Side Window Mechanism: I’ll come up with either a hinge or slider system to allow partial opening and closing of the side windows

Another Blue Velomobile

My new Bulk velomobile has made its journey from the Velomobileworld factory in Romania to Paris to LAX and on to Santa Barbara.

The specs that I chose are pretty mainstream for the Bulk with the exception of my exclusion of the “Hot Spot”. That’s the big appendage sitting on top of most Bulks used to house lights and cameras. I understand that having good lighting up high is a good safety feature. I don’t want the extra drag. Plus, I think that it could be shaped better – more aerodynamic and less clunky.

My friend David drove me down to LAX to pick it up in his big daddy RAM pickup truck. After a frustrating few hours of sitting in traffic and being ignored at the Air France Cargo warehouse, the 10 ft long, 200 pound crate was finally loaded up and back on the road to Santa Barbara.

The color scheme is unusual for a Bulk. Most are painted in at least 2 colors. I opted of a single color. The custom color that I chose is Porsche Miami Blue. You can see below that it’s similar to the color I painted my DF a while back. When I painted the DF, I was trying to find something similar to Miami Blue without paying the big bucks for the real Porsche paint. It is a Rustoleum color called Maui Blue available at any hardware store.

The Bulk was delivered from the factory very well set up and in pristine condition. Ben Park at Northland Velo was very helpful in guiding me through the ordering and shipping process.

Smaller DF NACA Duct

When I bought my Milan, I was surprised at how much air flowed through its tiny NACA duct. That duct was much smaller than the duct on my DF but seemed more than adequate. It was located quite a bit further back, towards the visor than the DF’s duct. My guess was that there was more turbulence in that area, causing higher pressures closer to the visor. That thought went on the back burner for a few years. Recently, I was looking for a project and remembered that old observation.

Perhaps it’s not this simple, but it seemed to me that a smaller duct should cause less drag. Location of the duct could also contribute to its drag. In order to play with these ideas, I made a new panel with a smaller duct, located as far aft as possible.In order to compare the duct’s ability to move air into the cockpit, I taped a small anemometer (wind speed meter) in the duct outlet in the DF’s dash. I did some back to back rides, noting the wind speed while traveling at 20 mph. With the ducts configured as shown above. At 20mph velomobile speed, the wind speed for the larger duct read 6-2 to 6.5 mph. The wind speed for the smaller duct read 8.1-8.3 mph. The small duct passed the first test – keeping me as cool as possible.

Now on to the next test. Does the smaller duct reduce the drag or at least not increase overall drag of the DF? To test this, I’ll do some back to back coasting / maximum speed tests in the 30mph range. TBD.

Milan SL Heading North

Today I completed the sale of the Milan SL to Peter Borenstadt in Concord, CA. It’s been on loan to him for a couple months in an exercise to see if it could be refined to the point of being competitive at Battle Mountain. He has spent a lot of time and miles tweaking and making small improvements. I’m not sure if he’s got the Milan SL running at the same speed as his DF yet, but he’s decided to keep it to continue its possible journey to Battle Mountain next year. Now I’m down to just one velomobile. The hunt is on for the Milan’s replacement.

HP Scorpion FS 26 Trike Joins the Stable

My friend Dawn has gone through a few trikes in her many years of riding. When she bought her current Catrike Dumont e-Cat, she handed over her well-worn Scorpion FS 26 to our friend Wayne to figure out what to do with it. Wayne’s project list was already very long so the Scorpion sat for a long time. He mentioned to me that he just wasn’t getting around to the Scorpion. He wanted to know if I wanted to do something with it. Of course I said “yes”.

The Scorpion is not really my kind of trike. I prefer, low, long narrow racey trikes but I thought I might fix it up and find it a good home. It was in pretty sad shape. I did a deep cleaning and installed a new padded seat cover, chain, rear derailleur, bar end shifters, tires, and hydraulic brakes. After it was done, I realized this might be a better trike for my wife than the Trice Special. If she were to take over the Scorpion, I could re-configure the Trice for my own use. That’s a win-win. So I decided to keep the Scorpion in the family. Here are some photos after the restoration.

Interesting Strut Failure

This is the first time I’ve seen this particular failure. Maybe others have seen it. This was on a DFXL but could happen with similarly designed struts of other velomobiles.

My buddy complained to me that on left turns, his right front wheel of his DFXL (my former DFXL) has started dragging on the wheel well wall. So I looked for the obvious things like broken ball joints, bent tie, camber and trailing rods, broken inboard mounting points for the camber rods, egged out hole in the strut tower, broken spokes. I removed and inspected the strut and axle for anything obviously bent or broken. Nothing there.

Then, after putting it all back together, I grabbed and rocked the wheel from top to bottom. There was a lot of slop in that motion, but I couldn’t see where the excess play was located. I removed the wheel and screwed in a long M8 bolt into the axle to give me some leverage. When I rocked the axle up and down, I could see some movement between the strut tube and the strut base.

The strut tube is normally bonded (loctited) inside of the strut base and there should be no movement between them. I removed and completely disassembled the strut in order to re-bond the 2 pieces. The axle is also normally bonded in the strut base, but I could turn the axle. So I tapped the axle out of the base to have a look. I was surprised that after a gentle tug, the strut tube slid right out of the strut base. Upon closer inspection, I could see that the strut tube had cracked at the axle hole. I would never have seen this crack if I hadn’t removed the axle which allowed the strut tube to be pulled out of the base and inspected.

More Headroom in the Milan SL

In the few years that I’ve owned the Milan SL, I’ve tried numerous tweaks to squeeze my too tall body into the tight interior of the Milan. I’ve made several seats to position my body differently. I’ve made several versions of my own race hood to make more room around my knees. But with all of the modifications I’ve made, I’ve never had enough space above and around my head. So I set off to make yet another hood with more headroom.

The plan was to start with a copy of my current hood to make the plug (prototype) for the mold. I would somehow expand the “dome” area of the hood all while maintaining the sleek lines of the Milan (if possible). My first approach was to cut the dome into concentric rings. Then space those rings apart and fill in the gaps. This became unwieldy very quickly. Also it was very difficult to see how I could get the shape right and still provide enough space.

Then it occurred to me that I might be able to position a separate dome piece onto the hood to give it more height (more headroom). So I started with a hood missing only the top of the dome since it was going to become redundant. I then screwed on a section of dome high up on the hood tilted just the right way to roughly continue the lines of the visor area. This gave me the basic shape that I was looking for but left some nasty seams to be evened out with a lot of body filler and sand paper.

More sanding and priming…

More steps to completion. The processes of making the mold and the actual new hood from the mold are not shown here.

Notice that the hood grew in length in the process. It now partially covered my “No Motor” sticker on the rear bodywork. Also shown is the side by side shot next to the current hood (with the arrow).

Complete with mirrors, NACA duct, re-located “No Motor” sticker and goofy looking tail light housing.

After this latest re-work of the hood I ended up with an extra 1.5″ of space above my head.

The Missing DF Ribs

A while back, Peter Borentstadt pointed out to me that the DFXL has a pair of structural ribs that are missing from the DF. The ribs are approximately eight inch tall internal supports that live on the inside wall of the body at the top of the strut towers. I’ve owned a DFXL and now own a DF and never noticed the “missing” ribs. I’m guessing that they were added to the DFXL during its development to reduce any new flexing introduced by the extra height added to the body in those areas.

We’re always looking for ways to improve the DF’s performance for Peter’s Battle Mountain runs. Most of the improvements that we add make no difference to my performance at the speeds that I ride. However, little tweaks can add up for elite riders like Peter, who can power a velomobile into the high 50mph range at Battle Mountain.

I made a pair of ribs for my DF to be sure that they fit and could be permanently bonded in place. Fortunately, my buddy, David, was kind enough to let me make molds of the ribs installed in his DFXL. I didn’t want to make a mess of his cockpit while making resin-based molds so I used a technique that promised to be quick, easy and non-messy. I applied a 2 part silicone putty blob on each rib.The putty cured into permanent but flexible, rubbery impressions of the ribs in about 20 minutes. They were easily pulled off of the DFXL without leaving any mess behind. These impressions couldn’t be used as the final molds due to their flexibility. So I used them to make prototypes which I could tweak and body work into the final shapes. I then made the final molds from these prototypes.

I used a 2-part structural epoxy adhesive to bond the ribs into my DF.

I took a quick test ride after the ribs were installed and the adhesive had cured. Of course I couldn’t detect any difference in the handling or power delivery, but at least they didn’t cause any new problems. So I shipped a pair to Peter to install in his DF. Peter had this to say:

Not sure if this mod can be felt, but at the least, if someone sits in that spot it won’t cave in.  Structurally, the more the “U” of the bridge is closed the better.  I think the cornering should  be better at the extreme.  Maybe it will feel more solid overall on rough surfaces.

Just having a quick look, I think they would be helpful in case of a rollover.  Some extra protection.

A New Trunk for the ICE Air-Pro Seat

I’ve never been happy with the various bags and boxes that I’ve used to store tools snd spares on my Trice Monster’s Air-Pro Seat. They always rattled around and looked like an afterthought. A few months ago I had some free time while recuperating from back surgery. So I thought I’d tackle the problem by making a carbon fiber trunk that could be securely mounted to the seat. The goal was to make it just large enough to carry tools and spares and to look like it belonged on the Monster. With the first version, I tried to use the space between the upper seat back and the rear wheel. Below you can see the foam plug which was eventually painted and used to produce the mold. Without showing the mold and the intermediate steps, you can see the final trunk mounted on the Monster.

I wasn’t too happy with this trunk. It looked too bulky and odd shaped on the Monster. It also had the obvious problem of only fitting at one seat angle. I wanted something that fit with multiple seat angles and was less conspicuous. So I came up with this rectangular shaped trunk that fits between the ribs on the lower back of the seat. The plug is shown below. It was made from a combination of a carbon fiber mold taken from the back of the seat and foam that was shaped and painted.The green tape, barely visible on the plug, shows where a door would be cut from the final part.

The two part mold of this plug (not shown) was difficult to make and more difficult to use. It was split along the line formed where the light part meets the dark part of the plug. The final part was built by laying up the two halves, cutting the door out of one half, then bonding the two halves together. Next, the door, with hinges and latch, was mounted. The part required some body work and paint to make it presentable. It’s mounted to the seat with M5 screws using existing holes in the seat. Access to the trunk is a little awkward. The rear seat bolt has to be released and the seat rotated up.

I’m pretty happy with this trunk in spite of the marginal finish. I think that a professionally refined and produced product similar to this could be a decent seller considering how many ICE trikes are equipped with this seat. Perhaps a similar part could be made more easily and cheaply in ABS plastic using a vacuum forming process instead of hand layup carbon fiber. I leave that to the professionals.

A New SPAI (Stagnation Point Air Intake) for the Milan SL

I recently installed a new larger, 50mm x 50mm boom in the Milan. I purposely left both ends of the boom open for future use as an air duct. The nose end of the boom was hidden behind the bodywork. The cockpit end of the boom opened onto the rider’s lap. To add the ventilation functionality to the new boom, I needed to create an inlet opening in the nose to allow the airflow to enter the boom to cool the rider. The least aerodynamically expensive place to create an opening is on the tip of the nose where the airflow velocity is zero (stagnated) and the pressure is at its highest. This is called a SPAI (Stagnation Point Air Intake). The cockpit end of the boom just needs a simple 3D printed piece to direct or cut off the air flow. That is still to be done.

I decided to copy the Bulk velomobile’s SPAI, assuming that the Bulk (and the Milan’s) designer knows more about these things than I do. This meant that I needed to come up with a round intake of approximately 60mm in diameter with rounded edges. It needed to be made of carbon fiber in a configuration that could be flush mounted into the Milan’s nose skin. After a few false starts, I ended up making the prototype using a combination of 3D printed plastic pieces and modeling clay. I made a mold of this prototype, from which I made the actual inlet (shown below).

Here you can see the carbon fiber inlet before being surgically implanted into the nose. Feeding air from the inlet to the opening in the boom is this carbon fiber / PETG 3D printed tube. Notice in the Fusion 360 model below that the tube’s shape blends from round at the front end to square at the boom end.

Fortunately, I was able to locate some matching Avery reflective red vinyl needed to repair the stripes.